

DIY: Design a Unique Gmail Email Signature
Dream of creating a personalized email signature for your Gmail account? Start by following this detailed tutorial (with visual references).


As of 2025, people typically receive an average of 120 emails per day. How does one stand out in a crowded inbox?
Compelling hooks, calls to action, and images are all essential. However, I believe people underestimate the importance of a unique email signature. When done right, it succinctly identifies who is writing, how to contact them, where they are based, or what kind of role they serve.
Even if you don’t manage or represent a business, there are several benefits to creating an original email signature for yourself. Besides facilitating communication and reflecting professionalism, it can also build trust, legitimize your brand (whether personal or professional), and even boost social media growth.
Speaking of social media, would you like to see a tutorial that shares how to add linked social media icons to your email signature? Let me know in the comments!
Since publishing my last tutorial, I found an even easier method for creating a memorable sign-off on Gmail. Let’s get started!
Full disclosure: I haven’t tested this template on Yahoo Mail, Microsoft Outlook, or the like—BUT it works like a charm on Gmail!
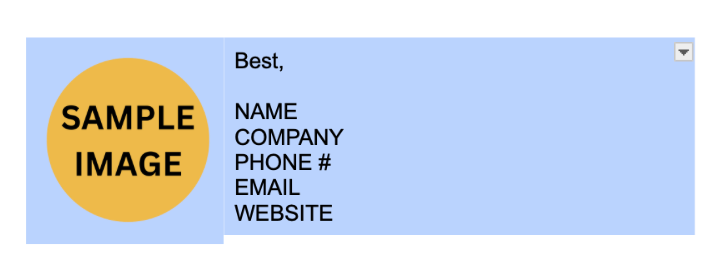
Gmail Email Signature
STEP 1:
Open Google Docs and create a new document.
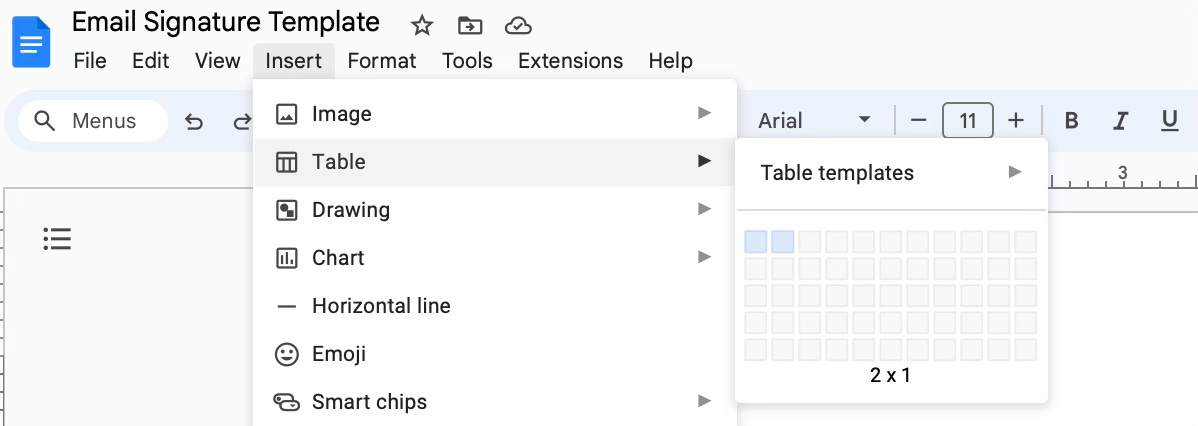
STEP 2:
Add a table. Select Insert > Table > Select 2 Squares (2x1). Using the border sliders, adjust the size of your table.
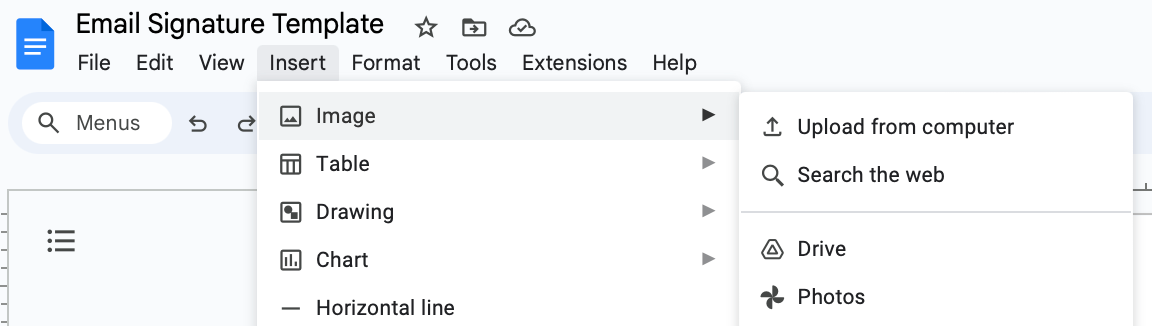
STEP 3:
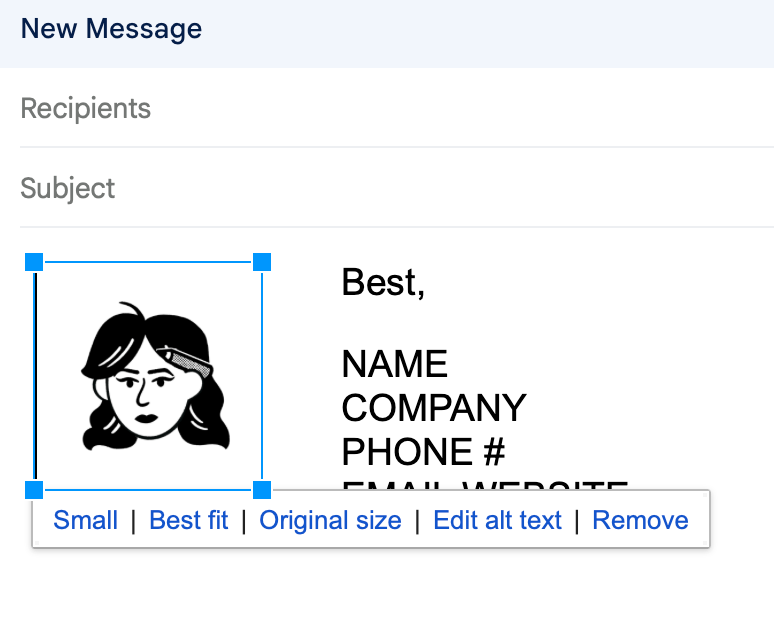
Insert your logo or photo into a column or row. Select Insert > Image > Upload from computer.
STEP 4:
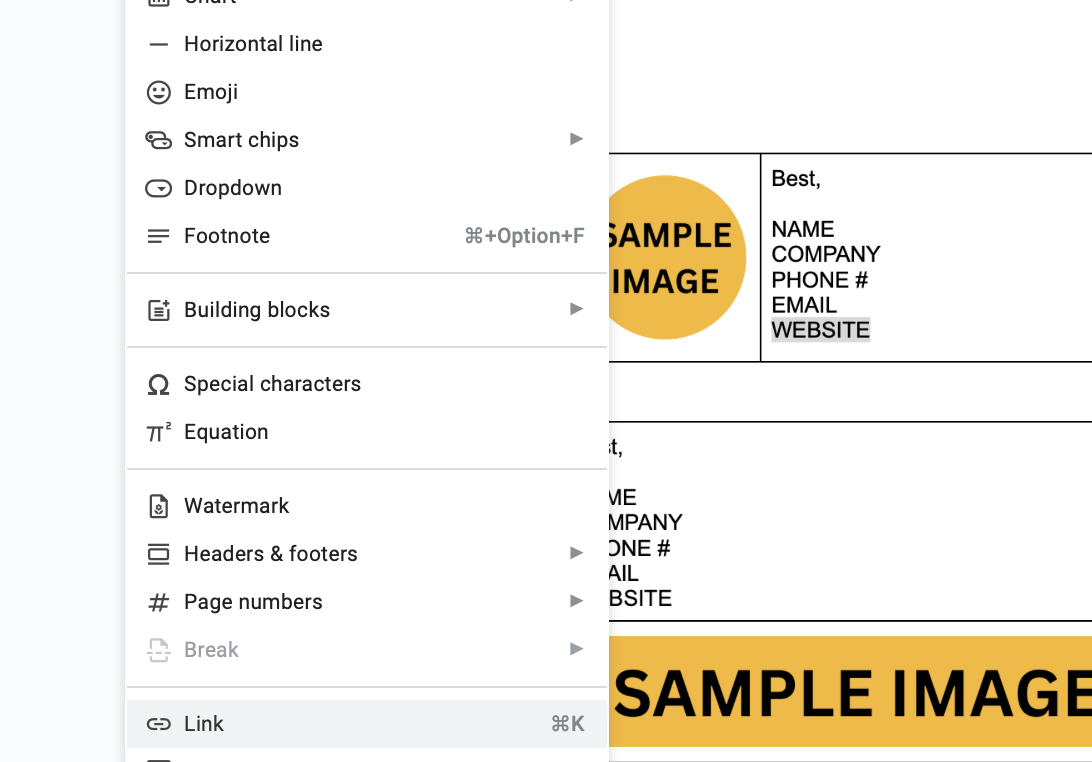
Add your text. The choice of formatting is yours! Most people include their name, company, position, phone number, and/or website.
If you want to add a clickable link, you can follow these steps: Hover over and highlight a section of text > Select Insert > Select Link > Paste the web address > Apply.
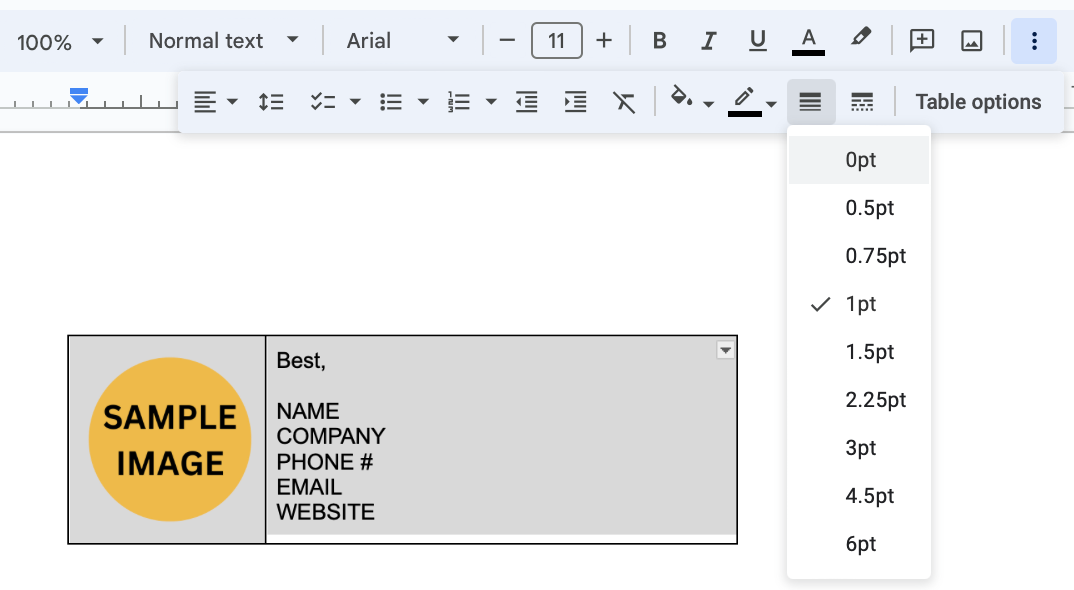
STEP 5:
To customize the table’s borders: Shift+Click to select the table’s borders > Click the “Border Width” button > Choose 0pt to make the border transparent.
STEP 6:
Once the border is transparent, highlight the entire table. Select Edit > Copy.
Starting here, the instructions (and example images) are different from my last email signature tutorial!
STEP 7:
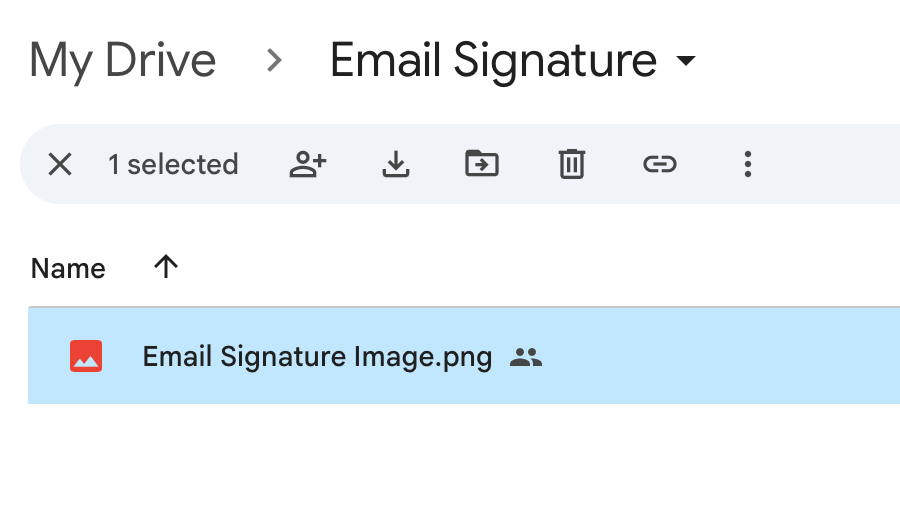
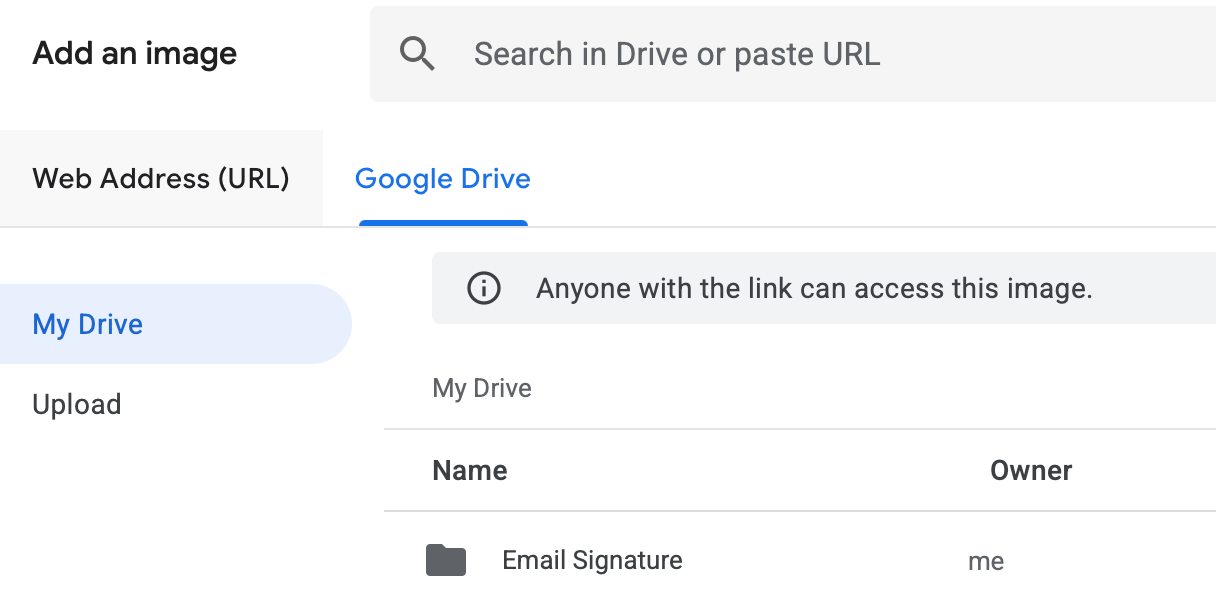
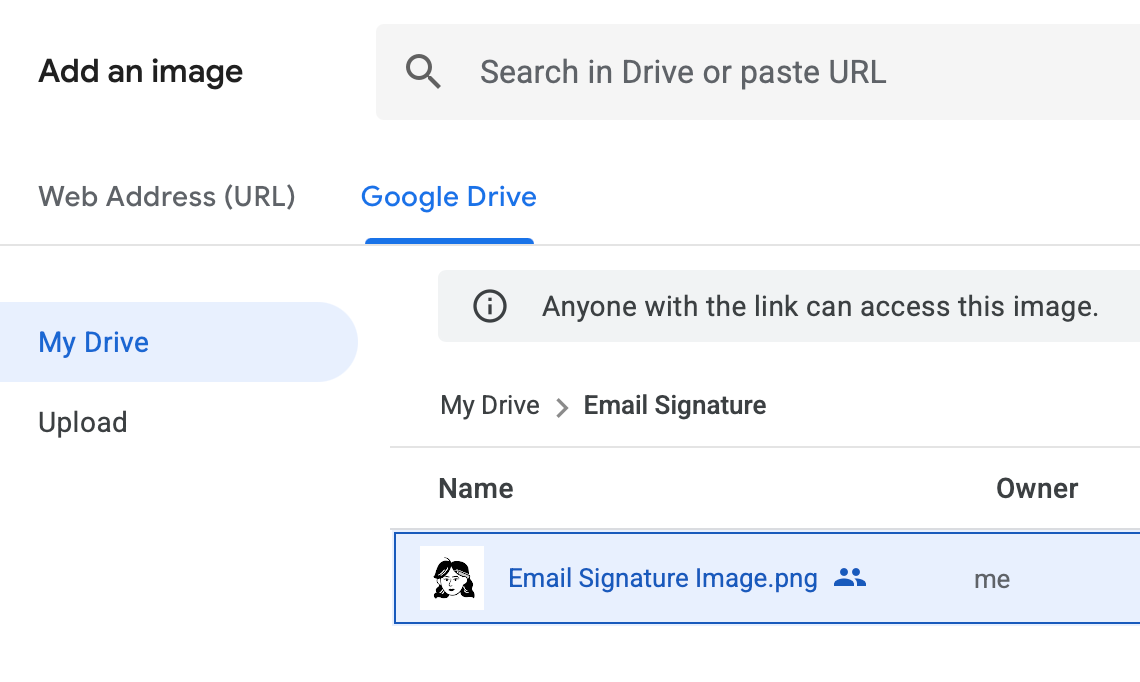
After you make the table’s border transparent and copy the design, Create a folder on Google Drive > Drag and drop to upload your image(s) there.
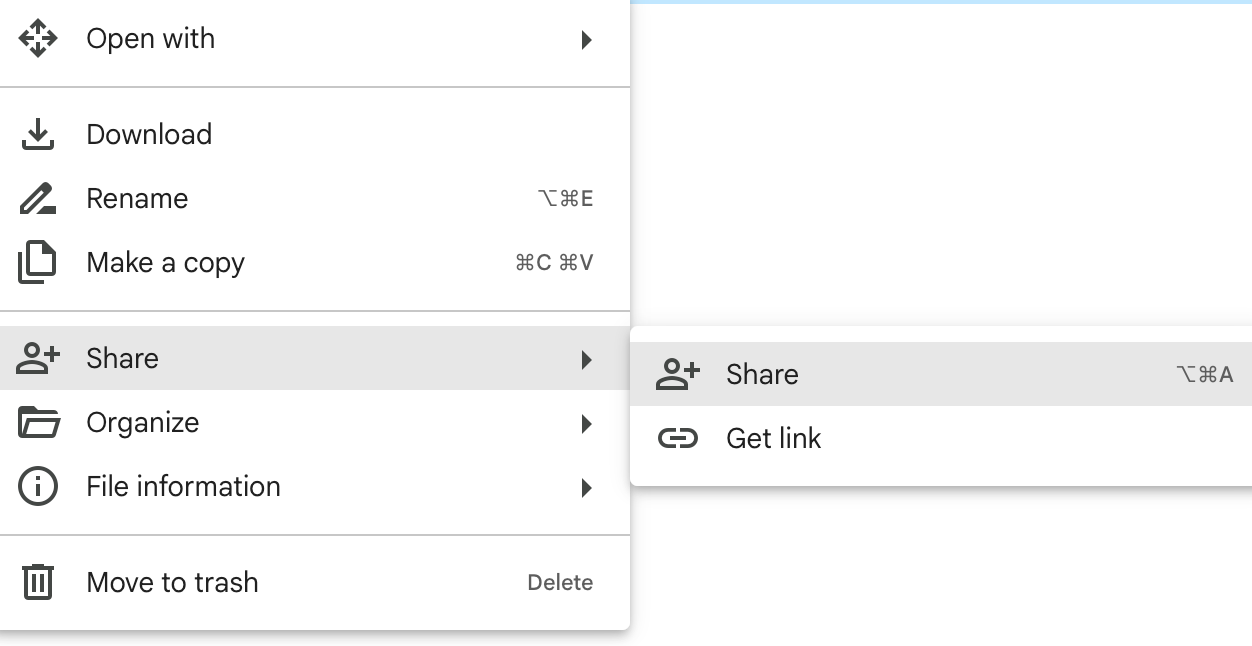
To make the image appear: Right-click on the image file in the folder > Select “Share” > Under “General access,” select “Anyone with the link” > Click the “Done” button.
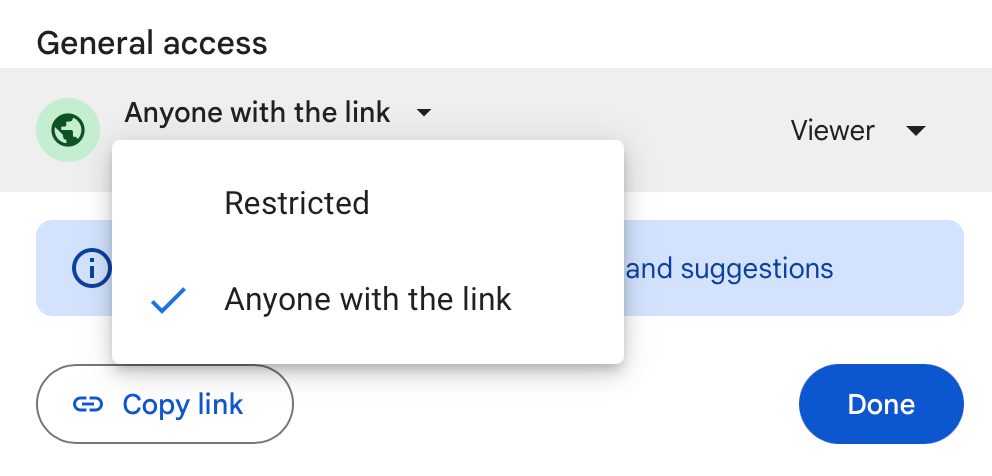
WHY IS THIS IMPORTANT? Google will NOT display your email signature’s image(s) if the photos or logos are not shared publicly.
STEP 8:
Sign into your Gmail account. Select the gear icon in the upper right-hand corner to access your email’s Settings > Click on the “See all settings” tab.
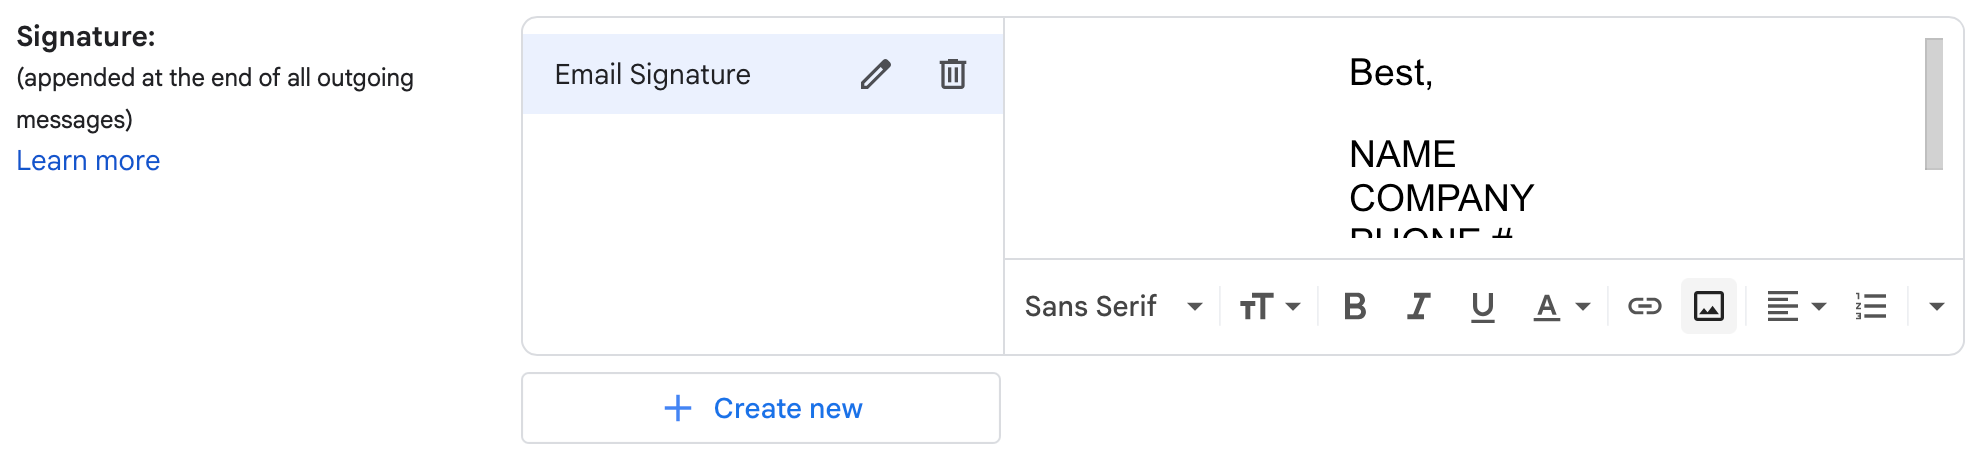
In the “Signature” section, you can paste the email signature template from STEP 6.
VERY IMPORTANT: Delete the image > Click the “Insert image” button > Switch to the “Google Drive” tab > Open your “Email Signature” folder > Double-click on the image to insert it into the signature.
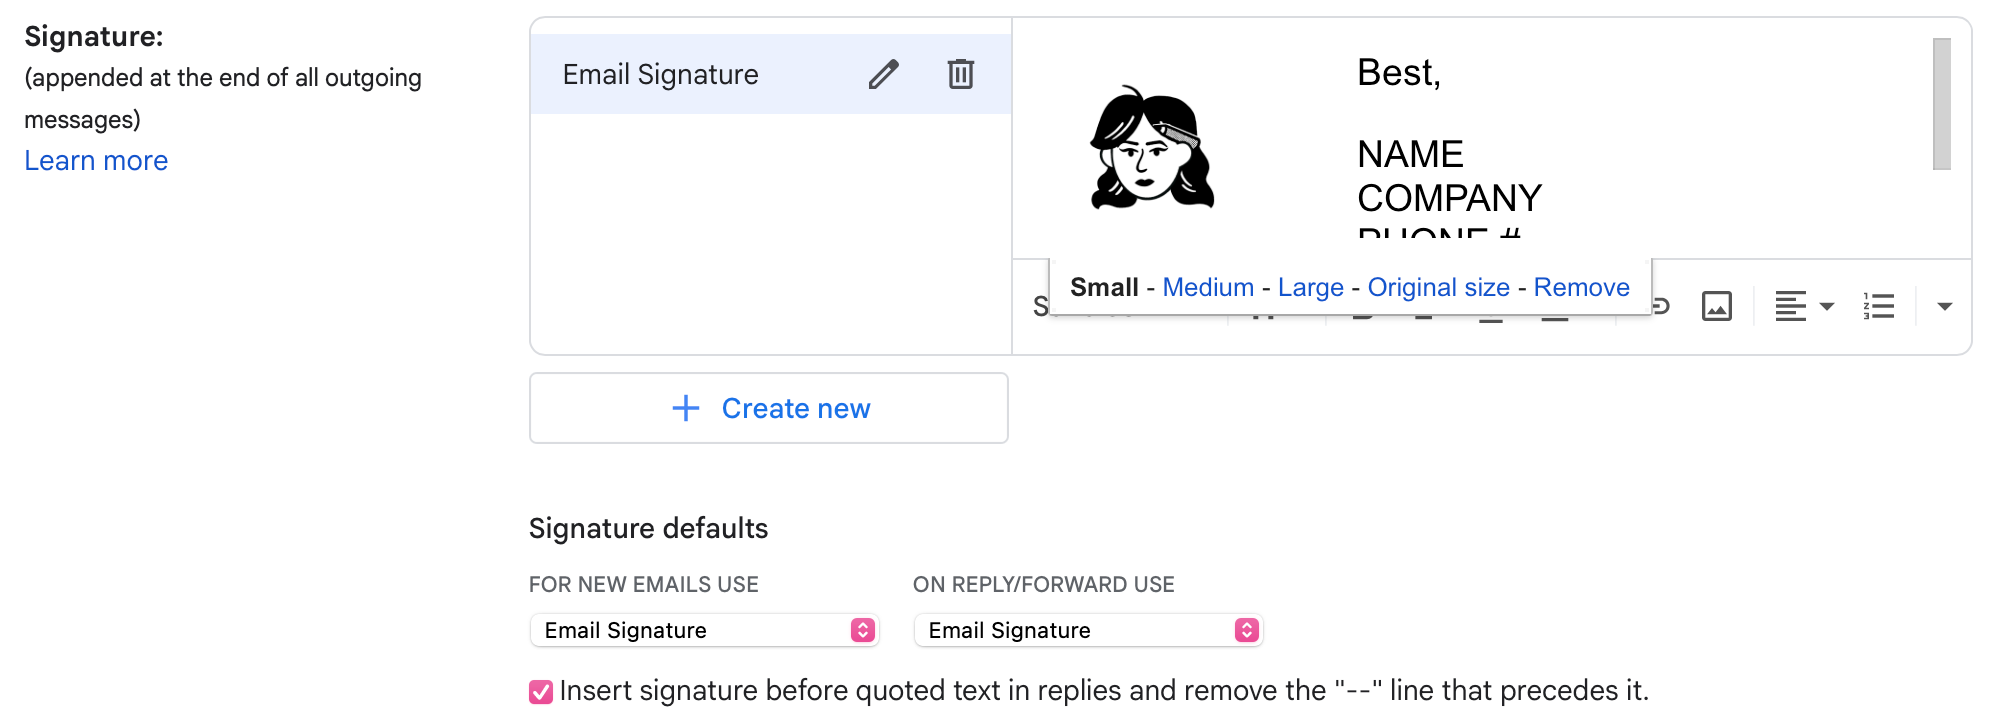
STEP 9:
Once you select the image, you can choose the exact sizing (Small, Medium, or Large) by hovering over it. I usually choose Small. Always remember to select your “Signature defaults” and click the “Save” button at the bottom.
TROUBLESHOOT: If you want to tweak the size even more, you can copy and paste the signature into an email draft, manually resize the image by dragging the corners up/down, and then repaste the entire signature into the “Signature” section of your email settings.
If you’ve made it all the way to the bottom of this tutorial, congratulations!! I hope you enjoy your brand-new email signature. Please comment below or message me with any questions. I’m here to help!