

DIY: How to Create an Email Signature
Follow this detailed tutorial to create an original email signature, so your message stands out in a crowded inbox.


So you’ve drafted a stellar email, but something is missing… Although the delivery is spot on, your email signature looks a little bland.
We’ve all been there.
Your word choice and sentence structure may be outstanding. But if you don’t have a memorable email signature, it’s like forgetting the ribbon on a present or the cherry on top of an ice cream sundae.
There are plenty of brilliant templates on the market, but who wants to purchase yet another subscription? If there’s a free and simple way to achieve similar results, why not experiment?
For a while, I used the bold and italic text features to stylize my email signature. They were easy and effective, but I wanted to make more of a statement.
As my company expanded, it was important to communicate the mission and branding with new clients.
It took a while to research different methods, but I found a couple that seemed to work.
The good news? My email templates are free and don’t require HTML or complex coding. Follow the detailed, step-by-step tutorial below to get started!
Full disclosure: I haven’t tested these templates on Yahoo Mail, Microsoft Outlook, or the like. Let me know if you do!
Apple Mail Email Signature
STEP 1: Open Google Docs and create a new document.
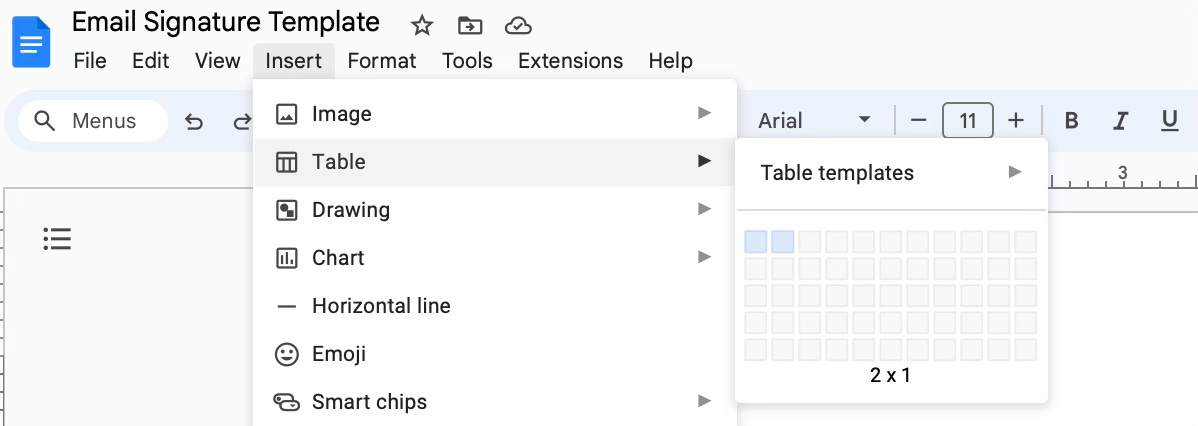
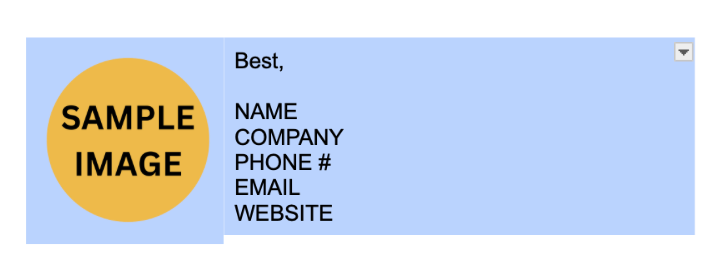
STEP 2: Add a table. Select Insert > Table > Select 2 Squares (2x1) or (1x2). Using the sliders, adjust the size of your table.
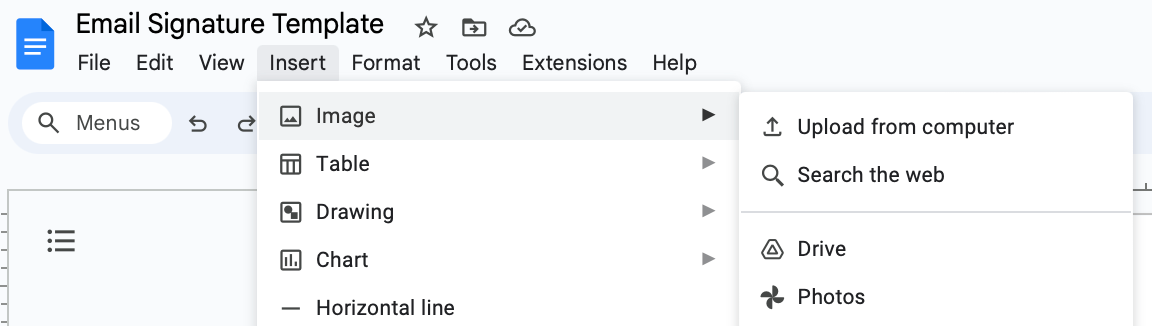
STEP 3: Insert your logo or photo into a column or row. Select Insert > Image > Upload from computer.
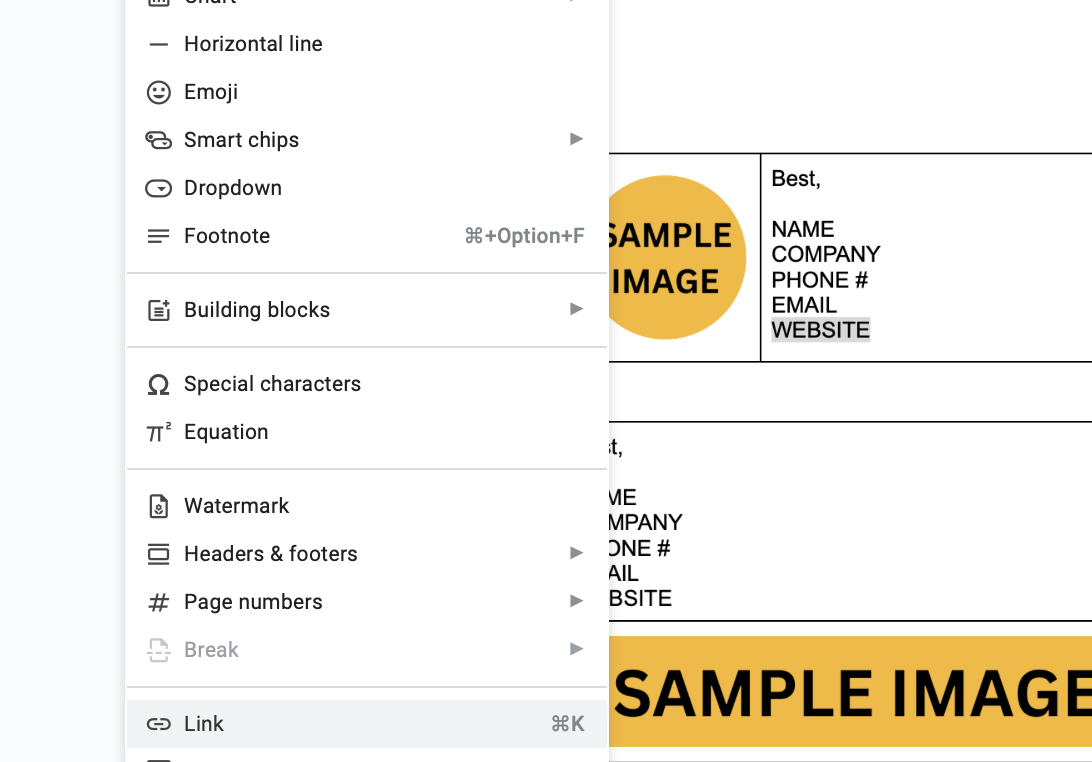
STEP 4: Add your text. The choice of formatting is yours! Most people include their name, company, position, phone number, and/or website. If you want to add a clickable link, you can follow these steps: Hover over and highlight a section of text > Insert > Link > Paste the web address > Apply.
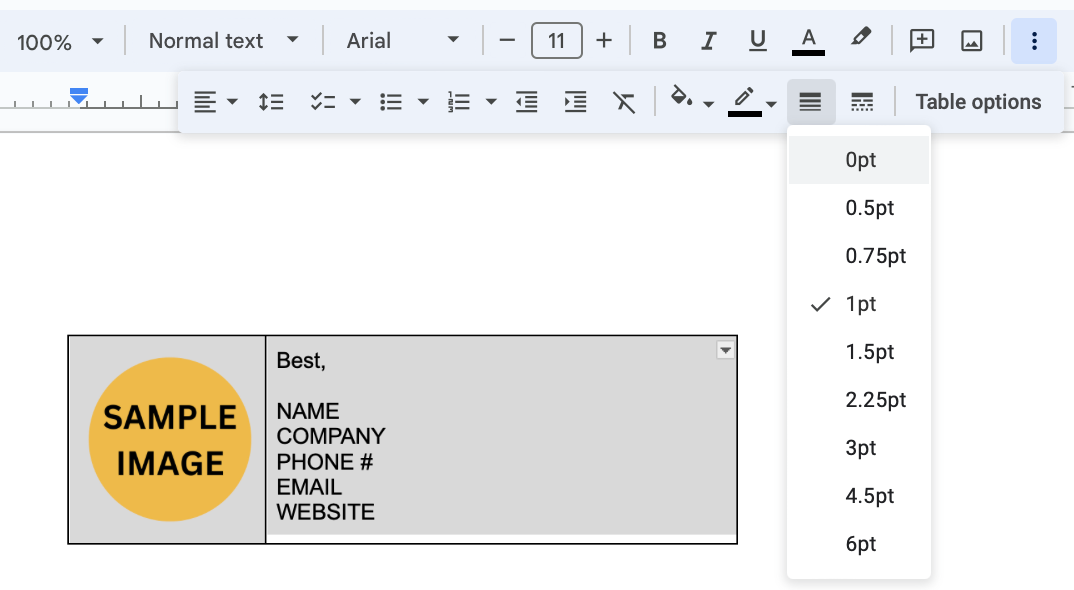
STEP 5: Shift+Click to copy the table’s borders and select the “Border Width” button. Choose 0pt to make the border transparent.
STEP 6: Once the border is transparent, highlight the entire table. Select Edit > Copy.
STEP 7: Open the Apple Mail app. Select Mail > Settings > Signatures > Select an account in the left column > Click the (+) icon to add a signature.
VERY IMPORTANT: Uncheck “Always match my default message font.” Paste your custom email signature in the blank box. DON’T PANIC if the image looks blank. It will soon appear…

STEP 8: When you compose a new message, be sure that your preferred signature is selected. Bravo, you did it!!

Gmail Email Signature
Follow the above sequence up to STEP 6. The remainder of this method is very different!
STEP 7B: After you make the table’s border transparent, you can upload your images to a public site. I use https://postimg.cc. Click on the “Choose images” button > Upload image > Copy the Direct Link URL.
WHY IS THIS IMPORTANT? Because Google will NOT display your email signature’s images, if the photos or logos are not publicly posted.

STEP 8B: Sign into your Gmail account. Select the gear icon in the upper right-hand corner to access your email’s Settings > Click on the “See all settings” tab.
In the “Signature” section, you can paste the email signature template from STEP 6.
VERY IMPORTANT: Delete the image. Click on the “Insert image” button. Select the “Web Address (URL)” tab and paste the image URL in the blank text box. Your linked image will magically reappear!
TROUBLESHOOT: If the background appears black for a PNG or JPEG file, you need to change the background to white instead of transparent.


STEP 9: Once you select the image, you can choose the exact sizing (Small, Medium, or Large) by hovering over it. I usually choose Small. Always remember to select your “Signature defaults” and click the “Save” button at the bottom.
TROUBLESHOOT: If you want to tweak the size even more, you can copy and paste the signature into an email draft, manually resize the image by dragging the corners up/down, and then repaste the signature into the “Signature” section of your email settings.

If you’ve made it all the way to the bottom of this tutorial, congratulations!! I hope you enjoy your brand-new email signature. Please comment below or message me with any questions. I’m here to help!