

DIY: Make a Fall Seamless Pattern
Learn how to make a fall seamless pattern in Adobe Illustrator!


Fall is upon us, and there is no shortage of seamless patterns! You’ll find them across books, journals, stationery, pens, mugs, textiles, blankets, wallpapers, and especially social media.
Beyond decoration, patterns provide color, repetition, and unity. Every design celebrates a different theme. Here are some quintessentially fall symbols:
Halloween: Spiders, cobwebs, black cats, ghosts, or jack-o’-lanterns
Nature: Maple leaves, tree branches, acorns, foxes, squirrels, or deer
Flowers: Sunflowers, zinnias, marigolds, asters, dahlias, vines, or leaves
Cozy Weather: Scarves, sweaters, apple ciders, books, or candles
Baked Goods: Whisks, mixers, oven mitts, spatulas, pumpkin pies, cinnamon rolls, glazed donuts, or spiced cookies
Comforting Foods: Squashes, mushrooms, corn cobs, casseroles, or turkey legs
Have you been wanting to create a seamless pattern? You’ve come to the right place! This newsletter covers 1 easy method in Adobe Illustrator.
BEFORE YOU START:
Gather inspiration. Pinterest is the perfect place to find festive imagery and build a captivating mood board.
Choose a color palette. Several websites offer an infinite number of hex codes: Figma, Color Hex, Savee, Canva, and Designspiration. OR if you find a special autumnal photo, upload it to Adobe Color and extract the color theme!
Brainstorm. Pen to paper, sketch your ideas! Texture and shading bring the simplest concepts to life. However, don’t create overly complex designs with a hundred layers. Too many details will only make your life more difficult…
Narrow down your designs. 3-10 elements is the ideal range! For example, you might choose a charming trio of acorns, leaves, and foxes.
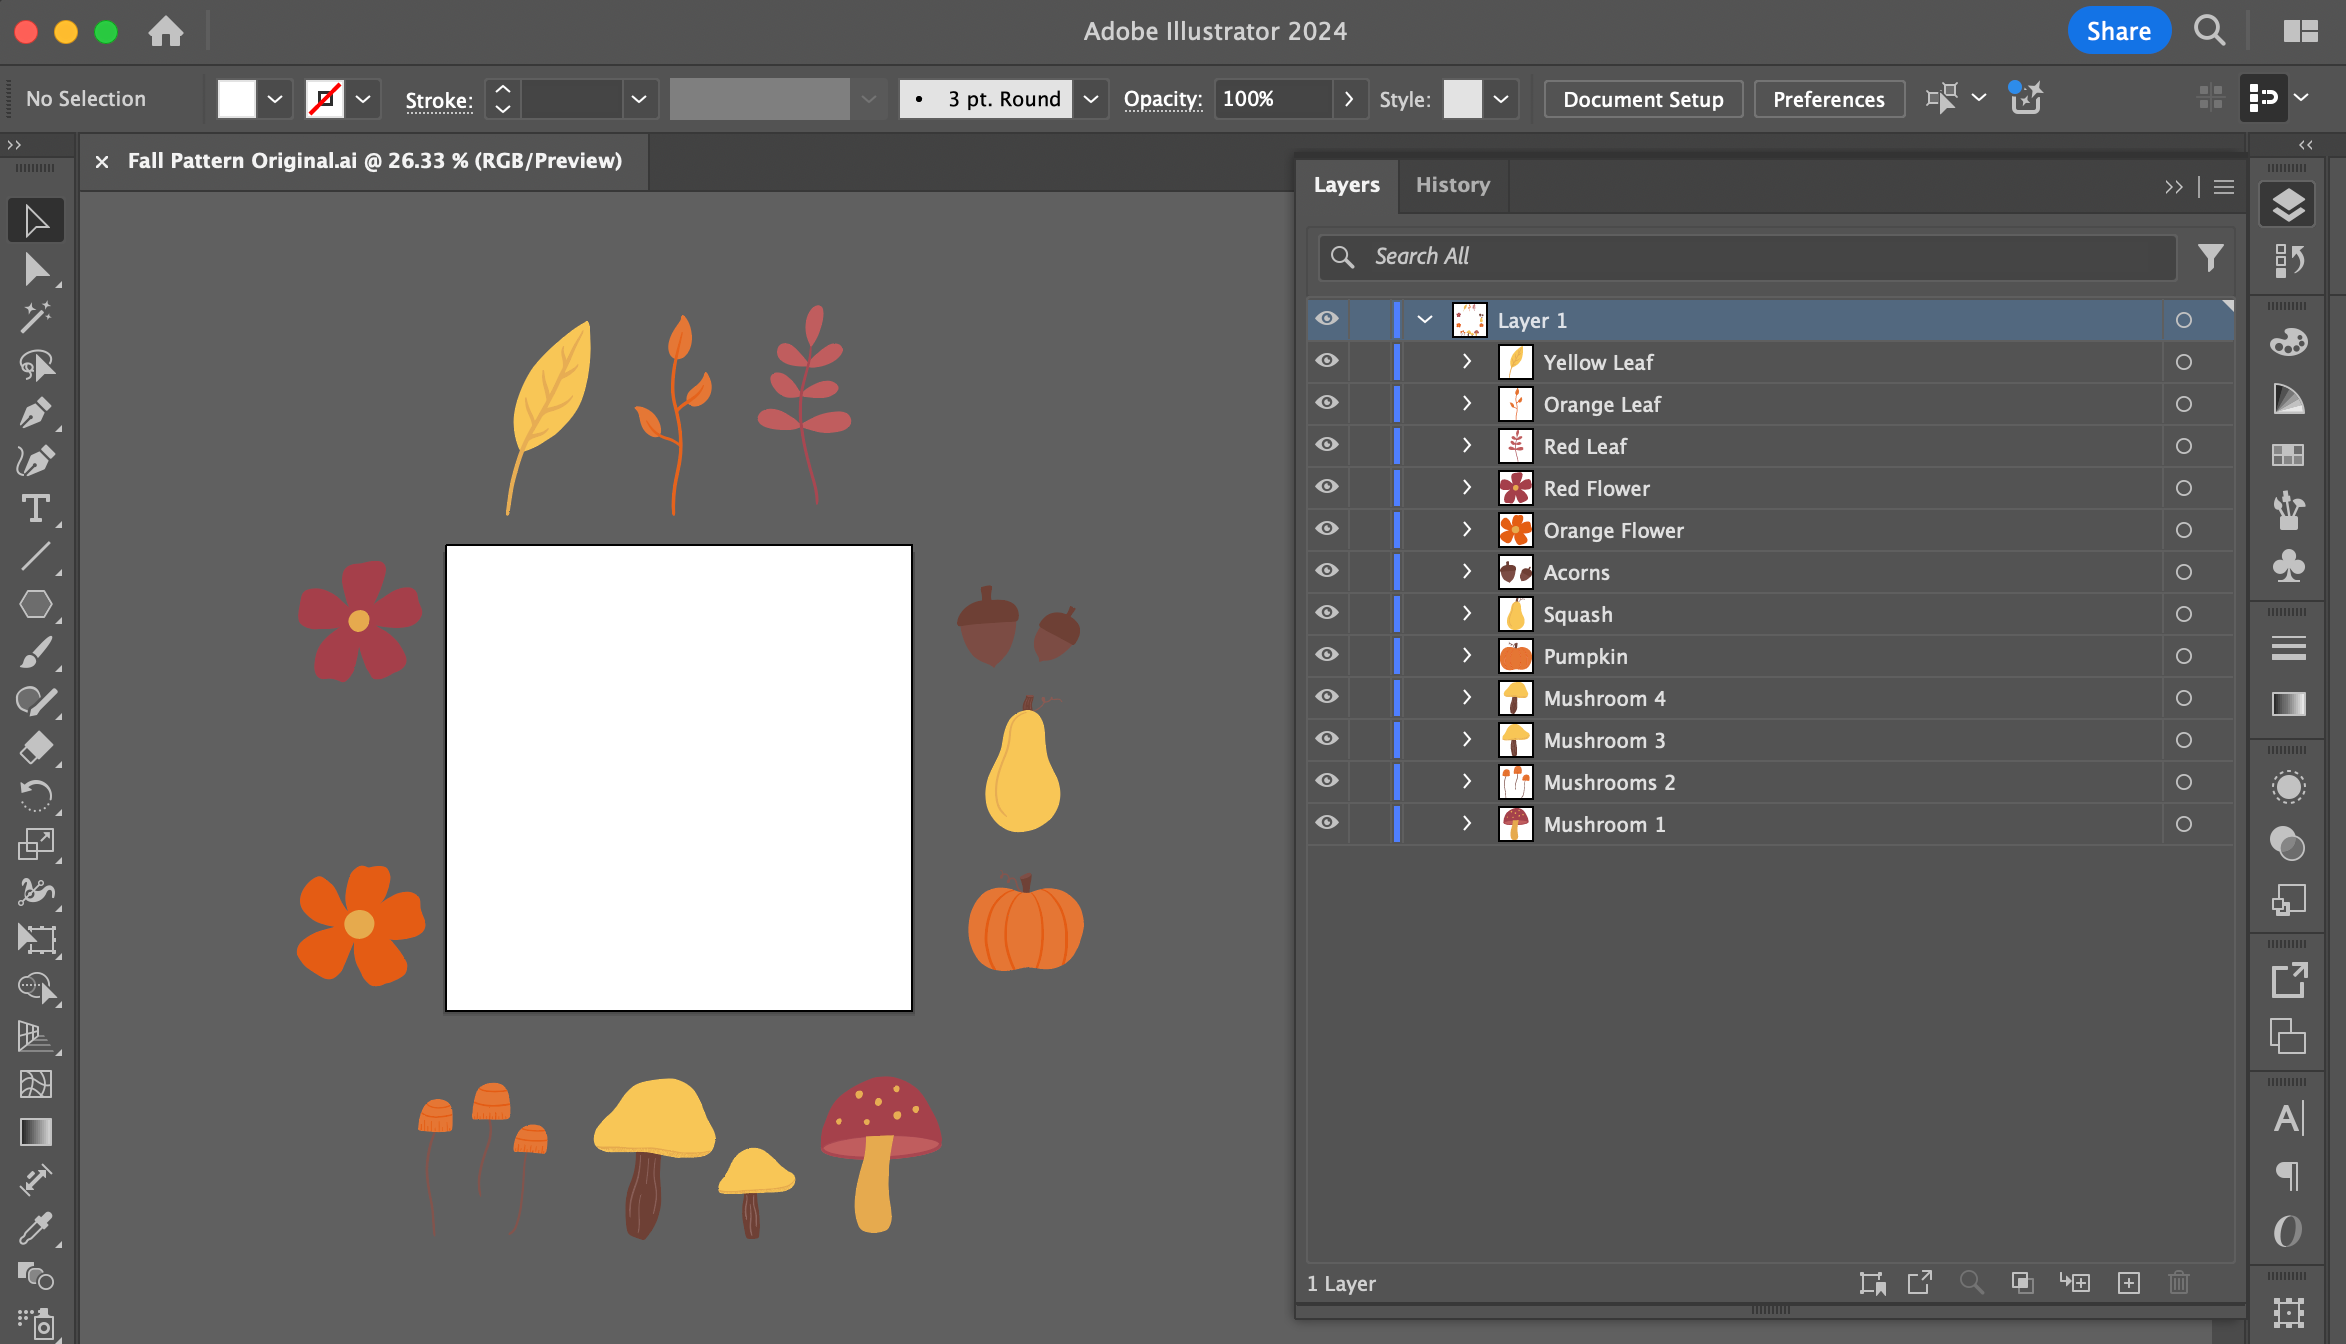
I drew my fall pattern elements in Procreate and imported them into Adobe Illustrator. Then, I utilized the powerful Image Trace tool to convert the PNG layers into vector artwork.
What does vectorize mean?
A typical image is pixel-based. Vectorizing utilizes mathematical formulas to transform any raster graphic into a series of points, lines, and shapes. This allows designers to build an infinitely-scalable work of art. In other words, they can resize elements without worrying about quality loss, especially fuzzy pixels.
Hexagon Pattern Method
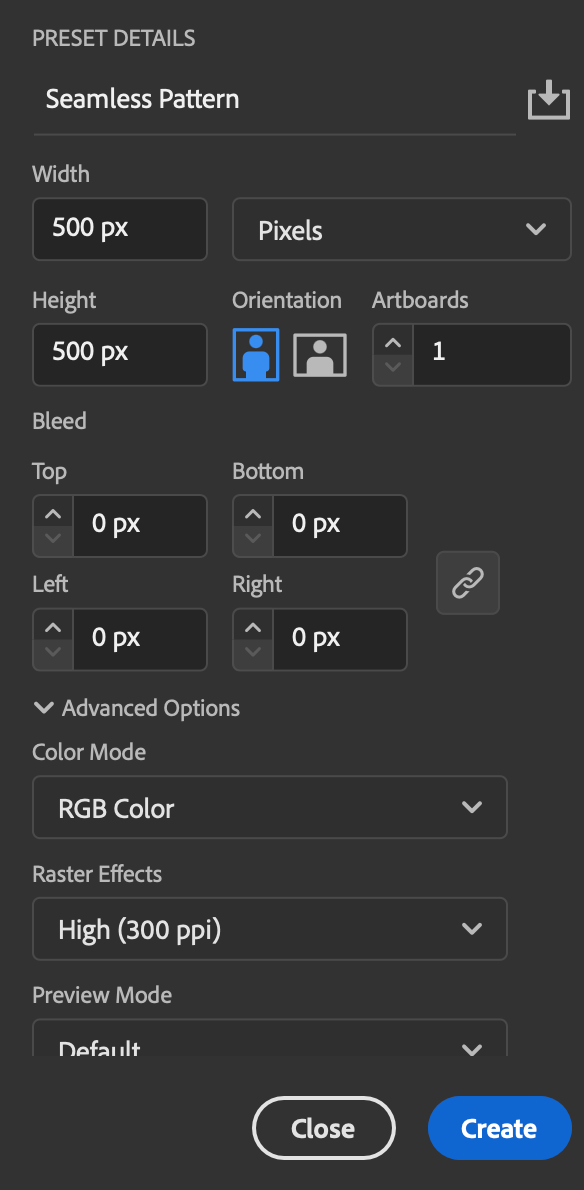
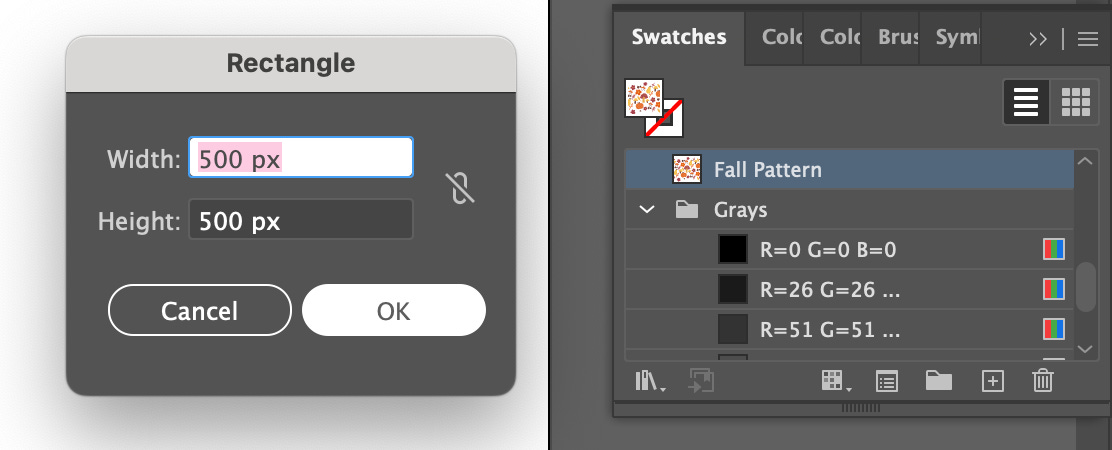
STEP 1: Open Adobe Illustrator. Create a new file with the following settings: 500 pixels width, 500 pixels height, RGB color mode, and 300 ppi.
STEP 2: Import* and label your vectorized fall pattern elements.
*If your elements are in a separate file (e.g., SVG, EPS, or AI), you can open it in a new Adobe Illustrator tab. Copy the object or group of elements by selecting the dot in the target column (to the right of the name). Finally, paste it into your primary pattern file. Here is a copy-and-paste tutorial!
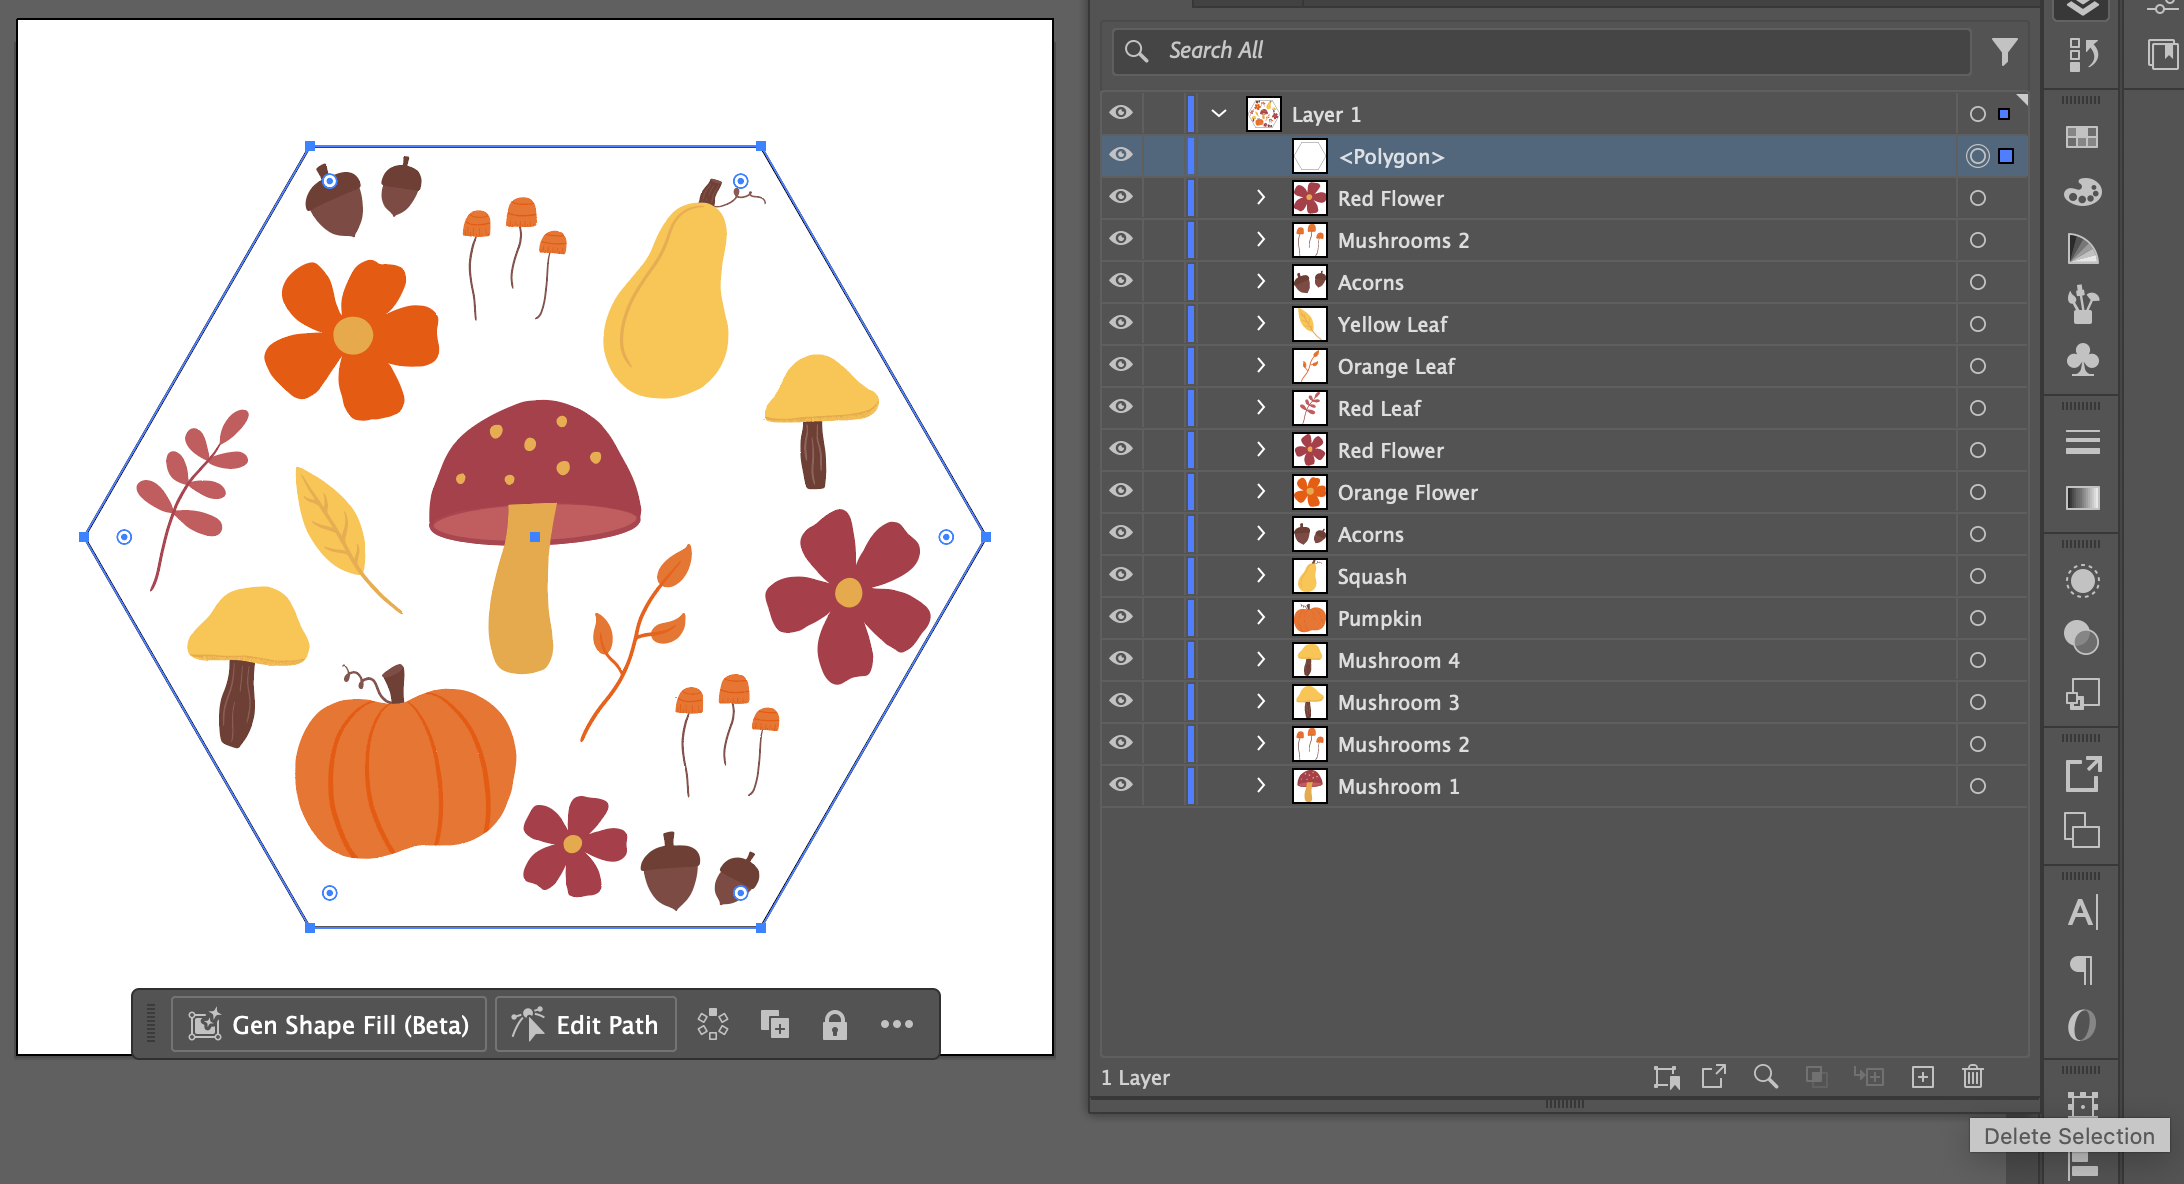
STEP 3: Select the Polygon Tool. Move your cursor to the center of the artboard and click in the center. Choose a hexagon shape (6 sides) with a radius of 218 px and select the OK button.


STEP 4: Select the polygon shape and change the stroke to 1 pt.

STEP 5: Arrange all elements within the bounds of the hexagon outline.
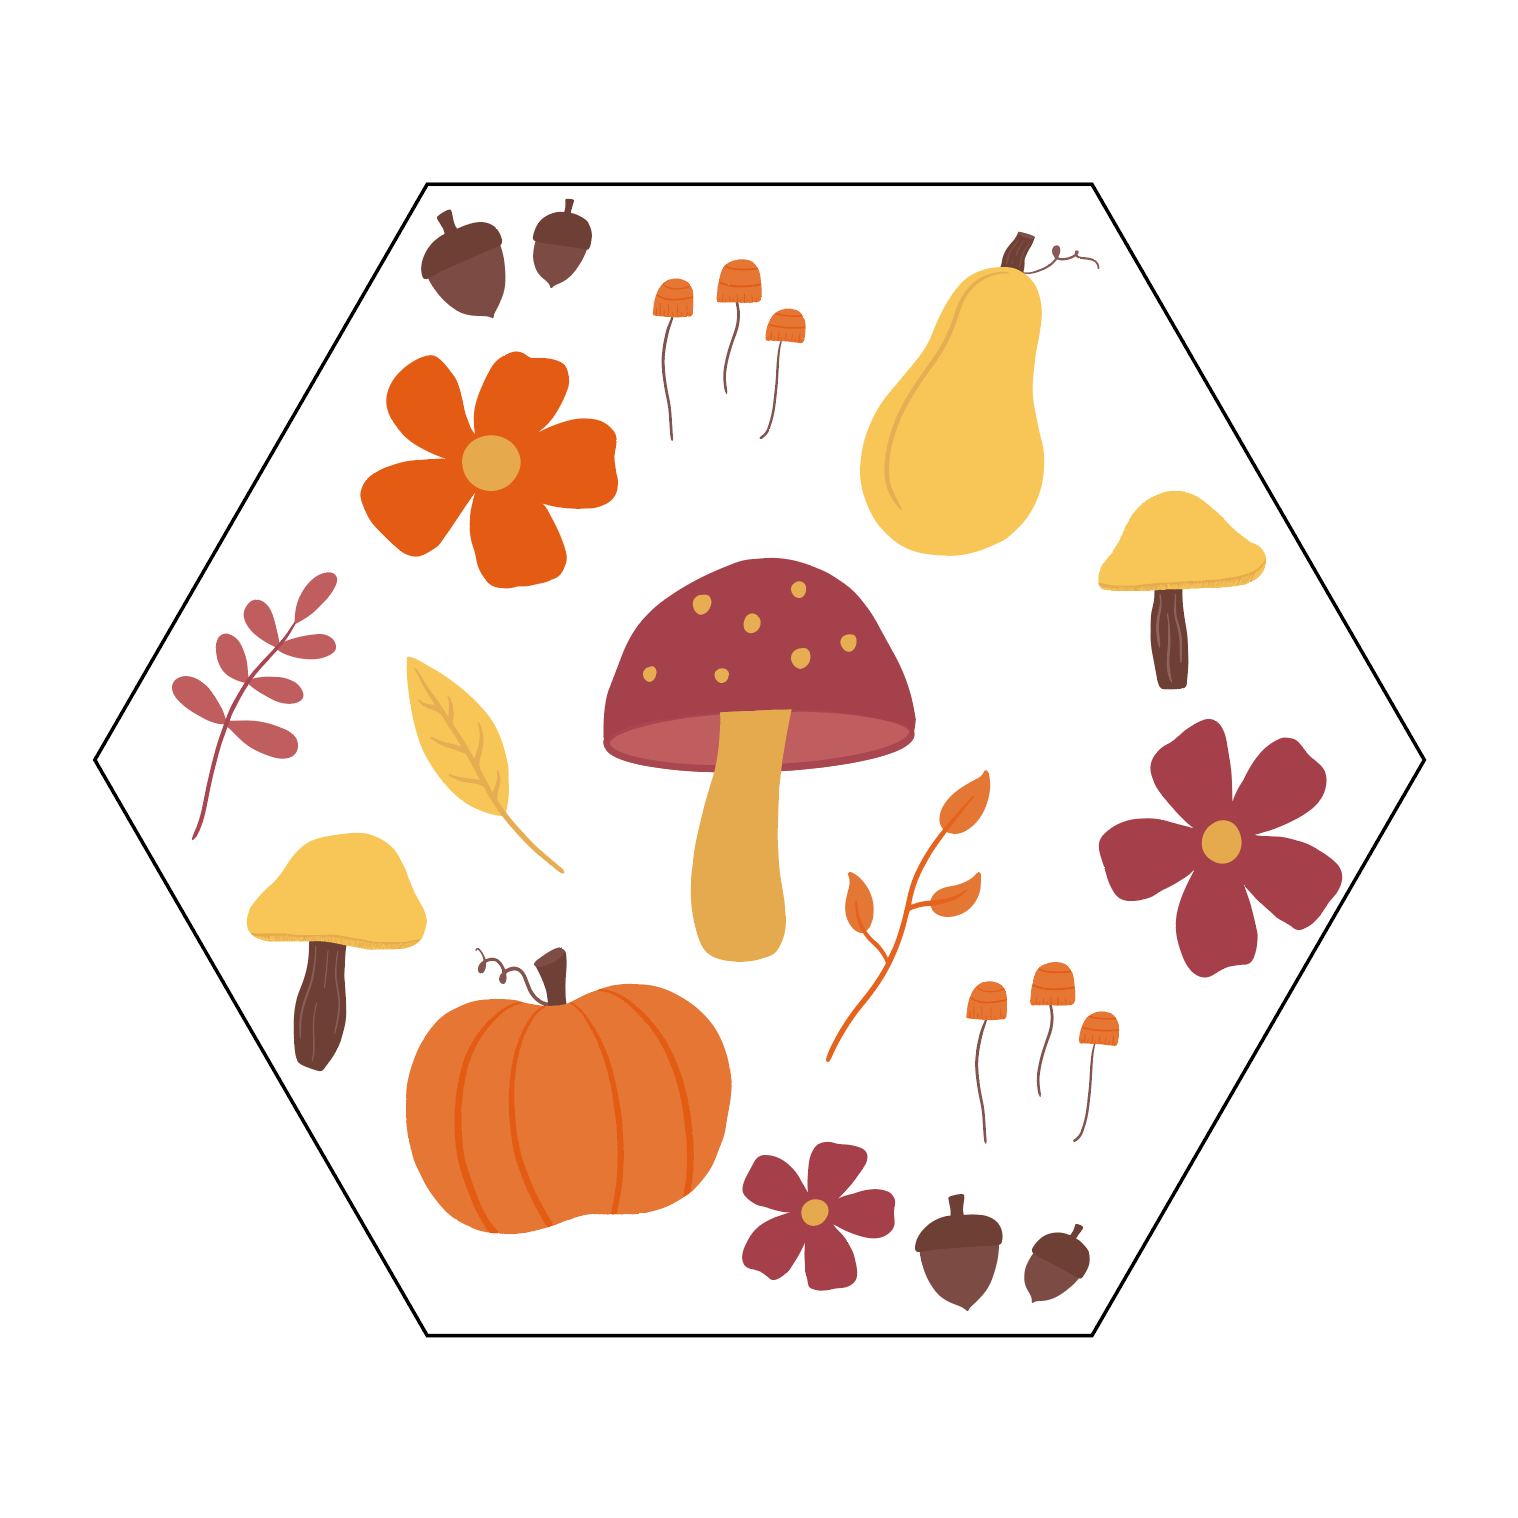
STEP 6: Once happy with your design, delete the hexagon outline.
STEP 7: Select all the elements in your pattern.
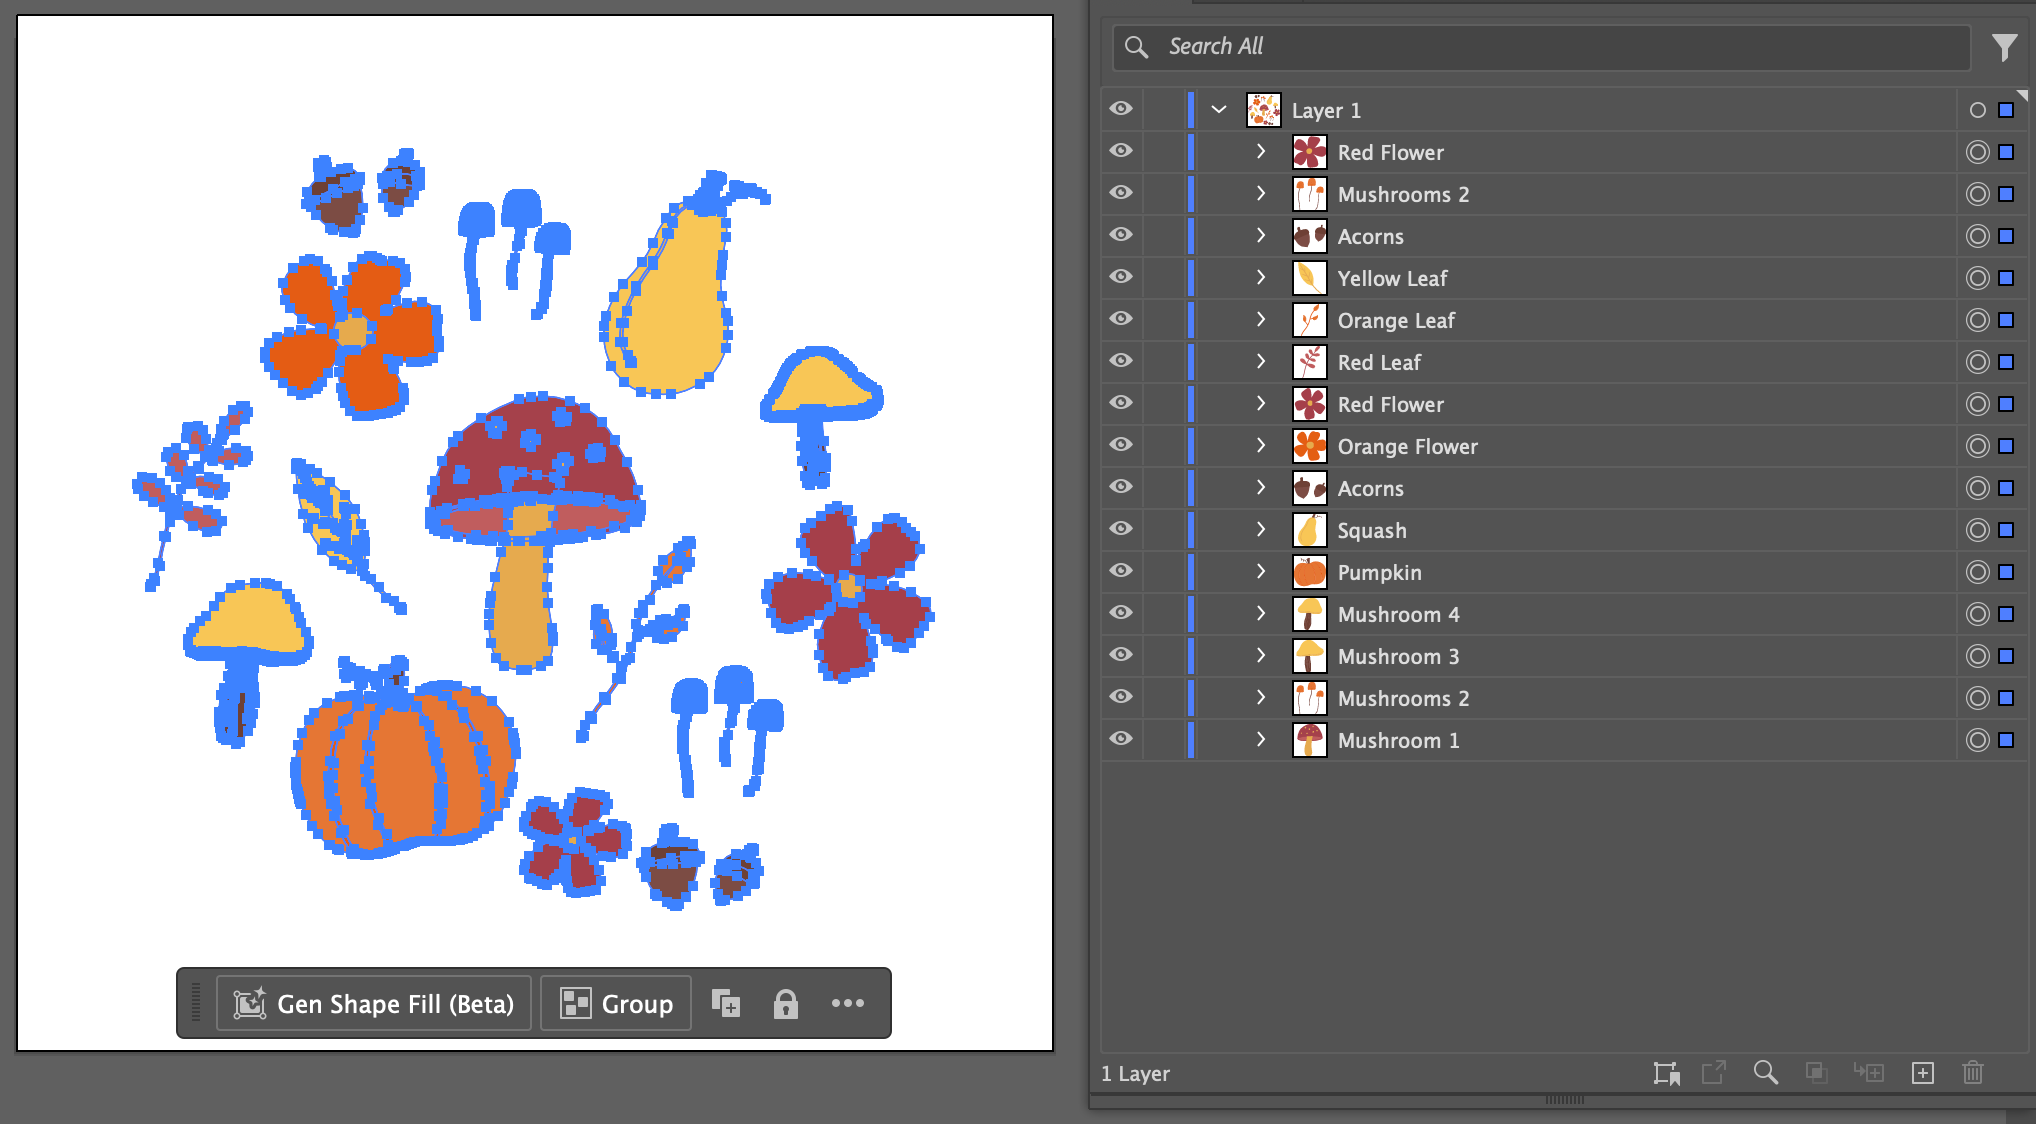
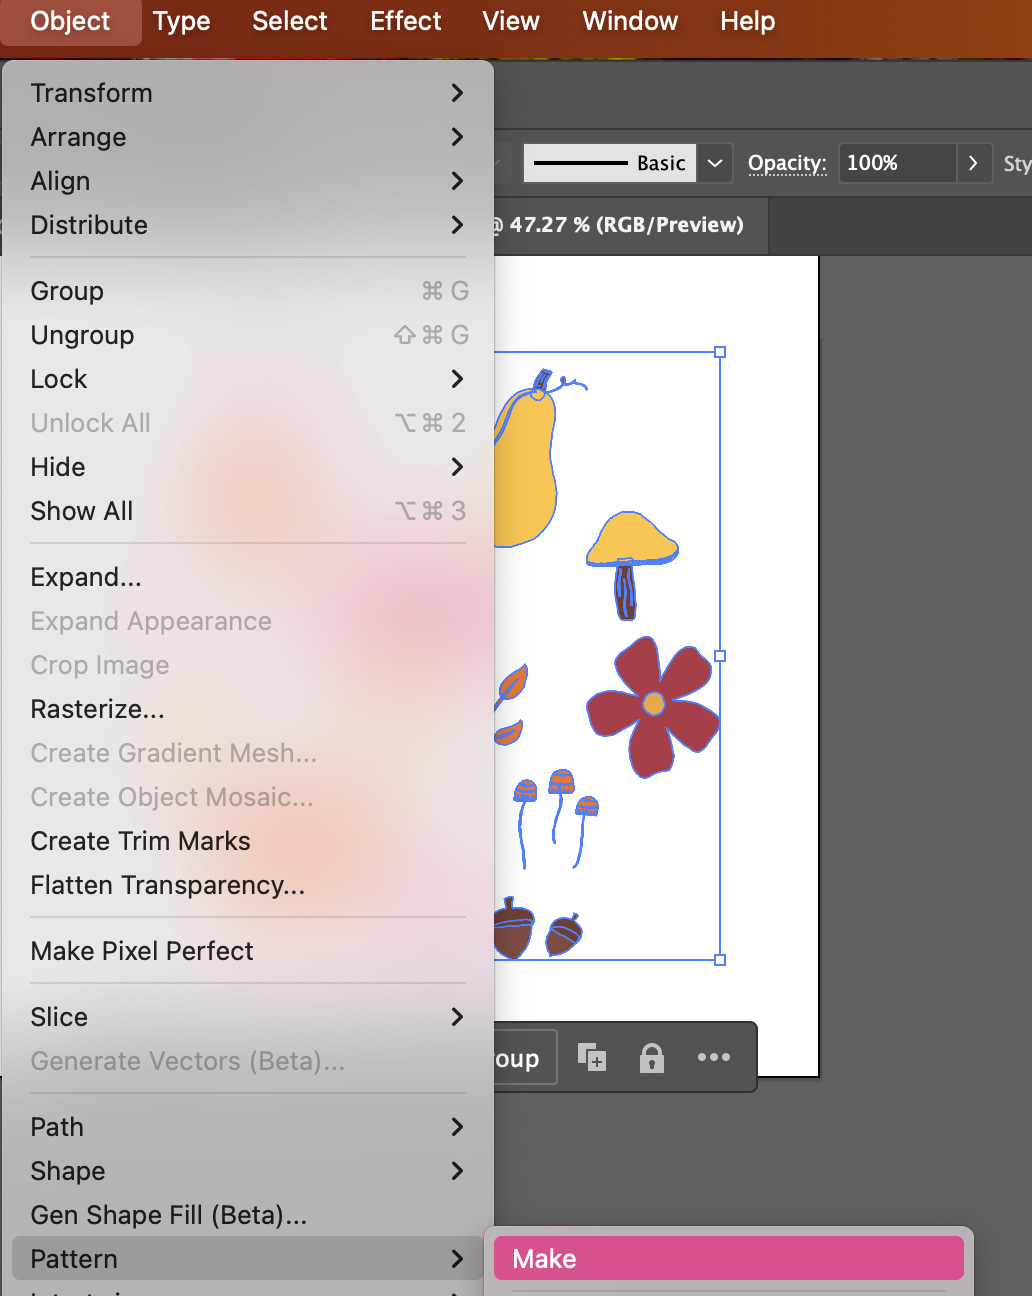
STEP 8: Select Object > Pattern > Make.
STEP 9: In the Pattern Options panel, type in the Name field to create a unique label. Under the Tile Type dropdown menu, choose Hex by Column.
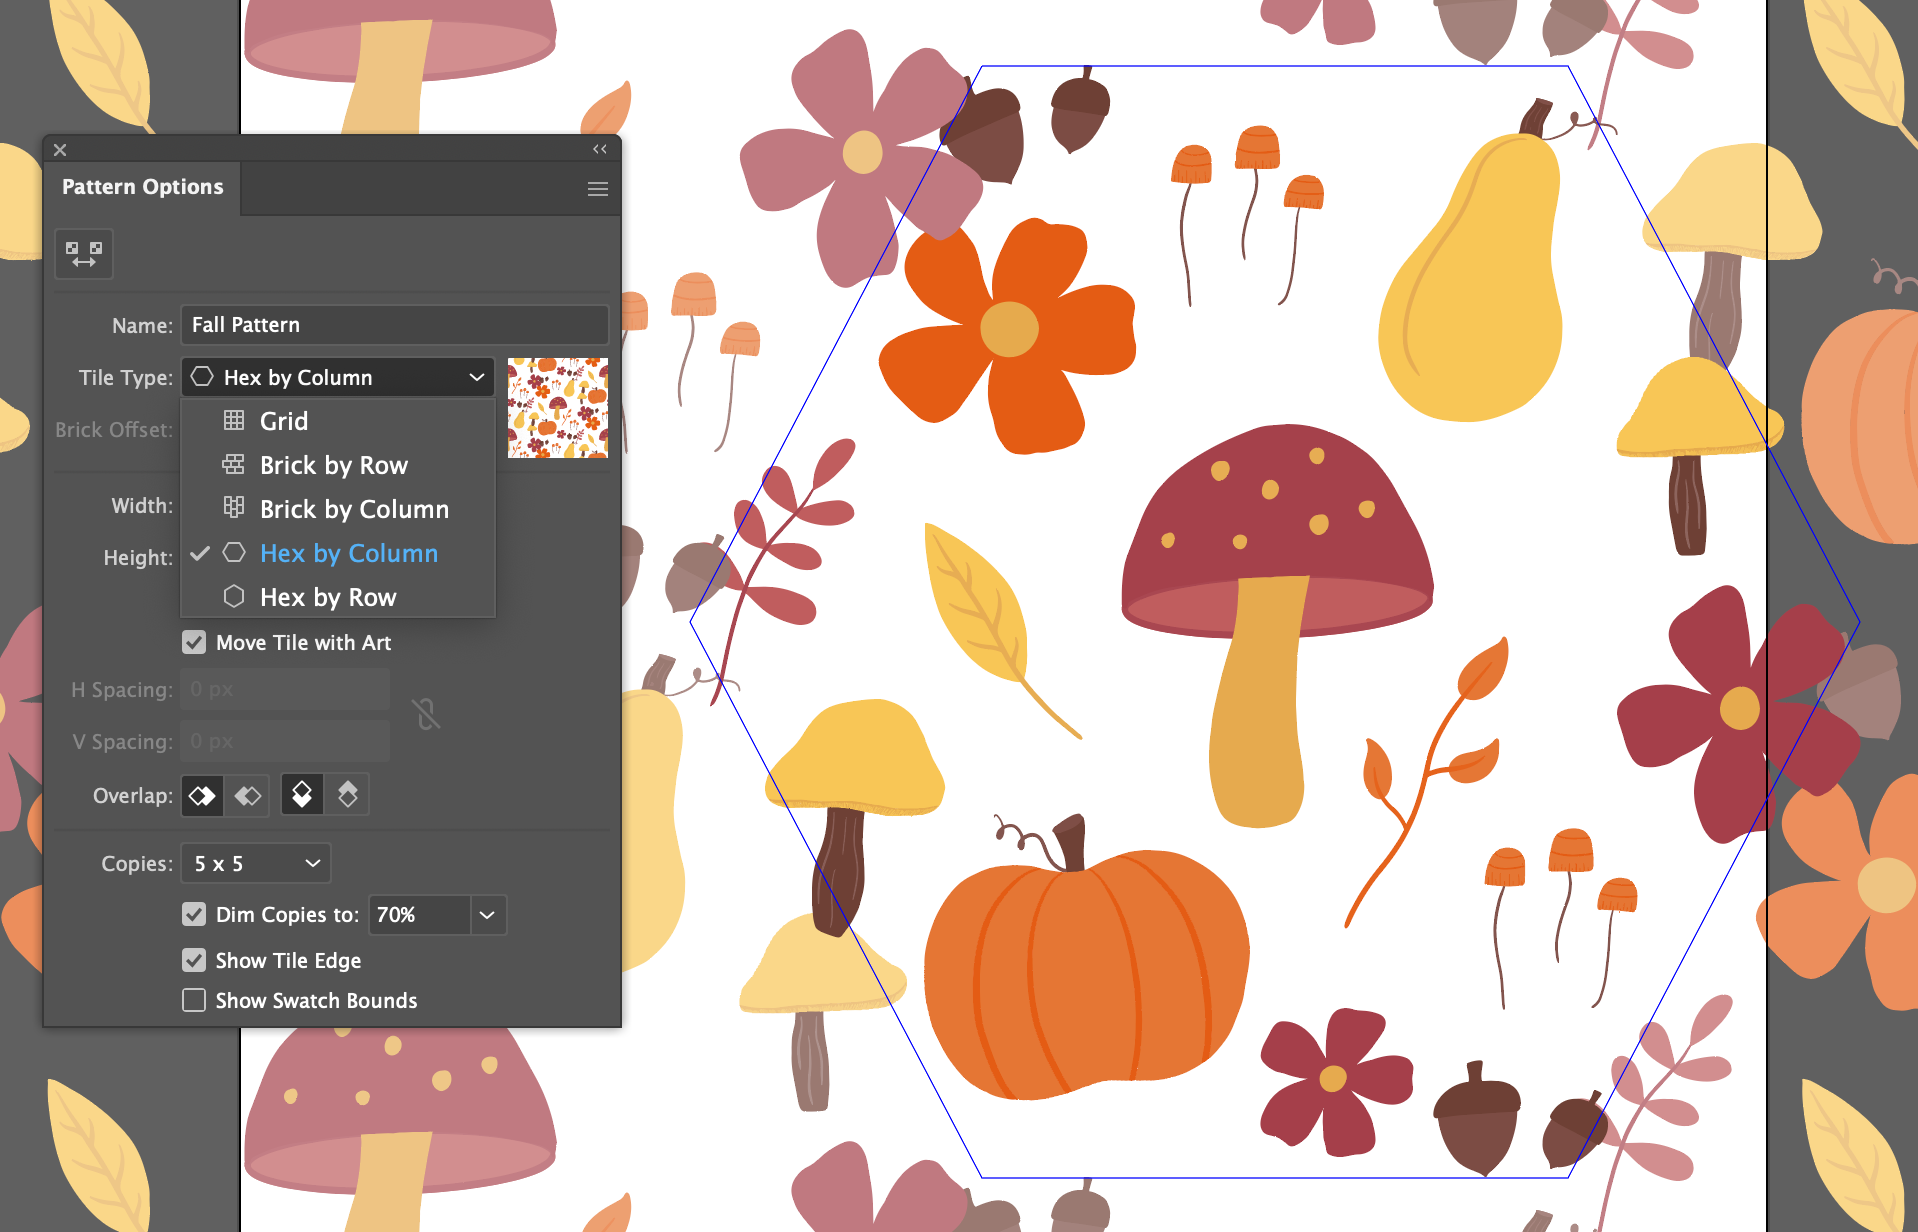
STEP 10: Space out your elements and adjust the width and height values in the Pattern Options panel. Move individual objects until everything looks seamless.


STEP 11: When finished, move your cursor to the artboard and double-click. A pattern is automatically generated in the Swatches panel! Test your pattern by selecting it and the polygon tool once more. When you drag and drop a shape, it should contain your new pattern!
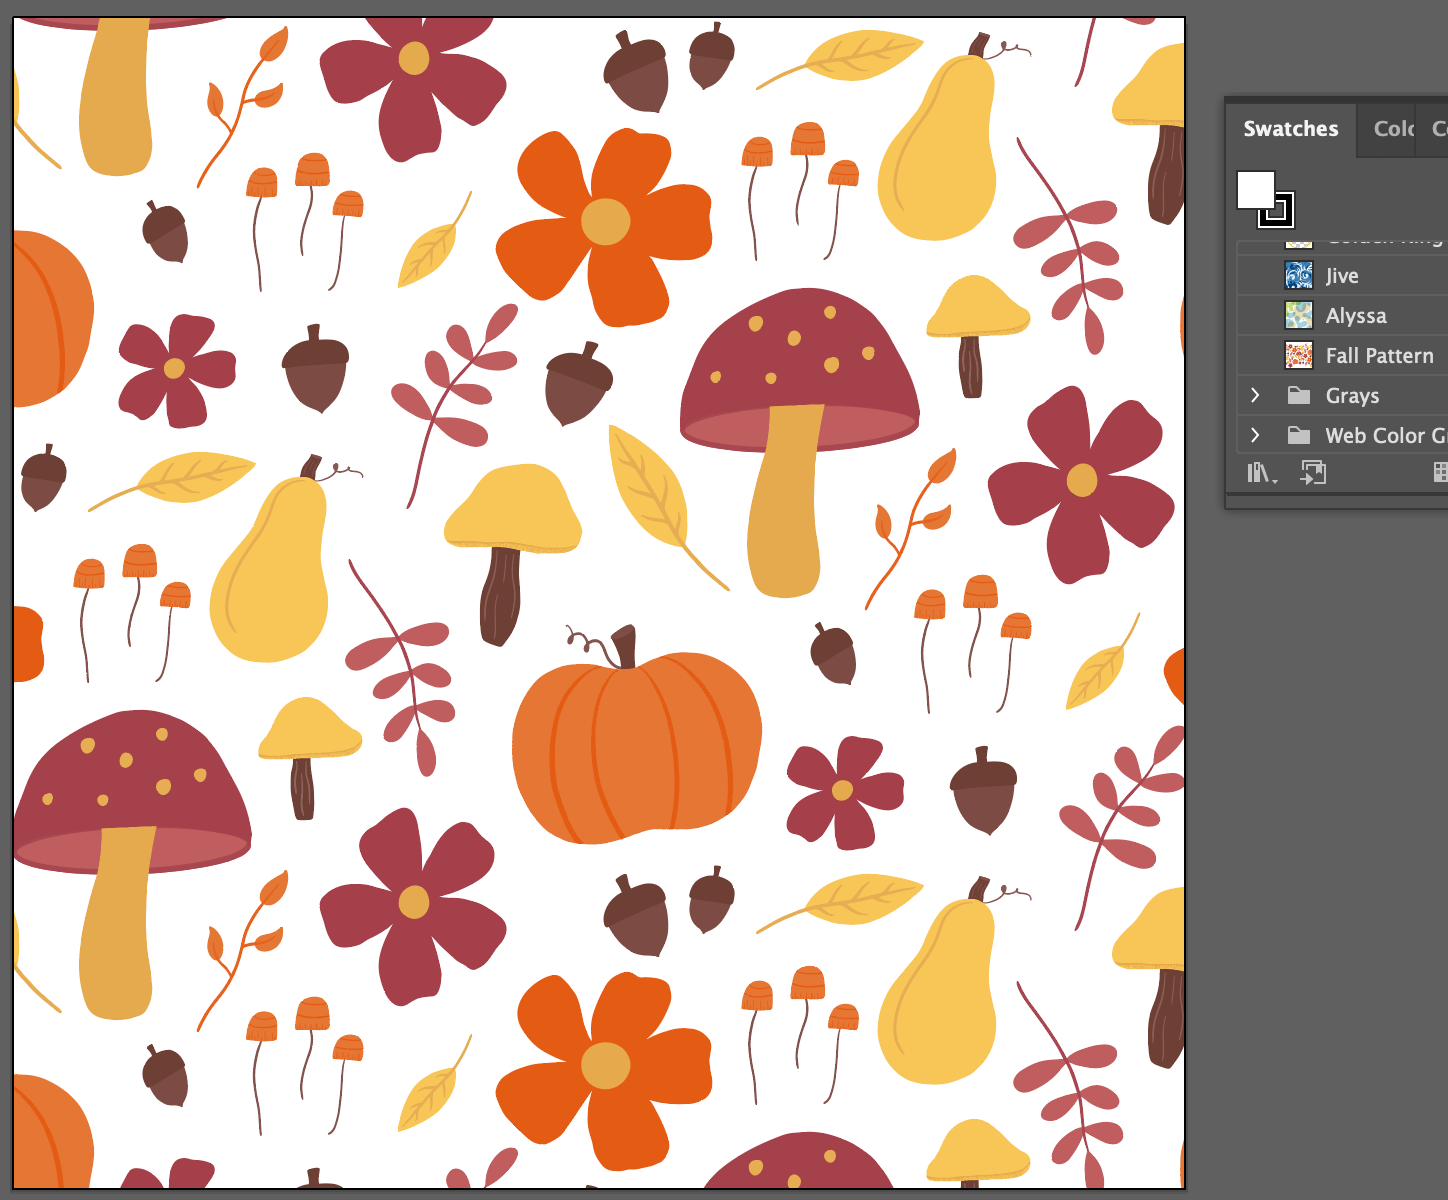
Congratulations, you did it! If you have any questions, please comment below. We look forward to seeing your incredible designs!!