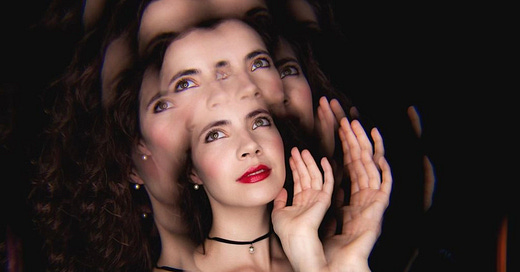
Creative Photography Techniques
Want to make an impact? Try these creative photography techniques!
Many image-makers believe they need the best camera, film stock, memory card, tripod, or light meter. But expensive equipment doesn’t guarantee anything.
There are many ways to see the world. None of them are right or wrong. This is what makes visual arts—especially photography—so fascinating. We may not be able to read people’s minds, but we can engage with their creations.
If eyes are the window to the soul, then photographs are portals.
During initial exposure, audiences witness the outer manifestations of a photographer’s inner workings. And then they cross the threshold, delving deeper. They investigate and interact with the subjects: questioning, commenting, and reflecting. As more and more viewers become active participants, they share their responses, expanding the art’s influence.
But how does one make a lasting impact in a saturated space?
“Learn the rules like a pro, so you can break them like an artist.”
― Pablo Picasso
In other words… Put what you learn into practice. Mistakes are inevitable, but you can always fill the “cracks” in your foundation with valuable experiences. When you’re ready and able, take risks and break the rules.
Art is not supposed to be perfect. Neither are artists.
When creatives are vulnerable, speaking from an authentic place, meaningful connections emerge.
Take a few moments to consider what you’d like to share with the world.
Whether you’re new to photography or a seasoned professional, someone is waiting for your art. You owe it to them to venture beyond and try something entirely new.
This newsletter is your sign to get out of your head and start. If you’re looking for inspiration, explore one of our go-to creative photography techniques. You never know what you’ll discover along the way.
Which will you choose?
Don’t want to damage your lens filters with foreign materials? Plastic wrap is a great substitute!
Create a moody tint by coloring the transparent barrier with a marker. Or maybe your vision includes haze? Just smear Vaseline on the surface for a luminescent sheen. There are endless possibilities!
Once you choose the desired effect and decorate the plastic wrap, hold it in place with rubber bands around the lens barrel.
If you’d rather not cover the lens, you could achieve an ethereal glow by folding the plastic wrap so it hovers around the edges of the frame.
SUPPLIES:
Camera and lens
Plastic wrap
Rubber bands
Tripod (optional)
Permanent markers (optional)
Vaseline (optional)
SETTINGS:
Manual focus
Medium-slow shutter speed (at least 1/125; slower than 1/60 requires a tripod)
Wider aperture (at least f/2.8)
You may find cellophane at a local craft store. Unlike plastic wrap, this vibrant material is thicker and more rigid. It also comes in a wide variety of eye-catching colors, shapes, and sizes. Some versions are square and jewel-toned, while others come in long iridescent sheets.
Cellophane is a cheaper alternative to professional gels. When placed in the foreground or background of your images, it enhances texture and dimension.
SUPPLIES:
Camera
Longer telephoto lens (70-200mm)
Cellophane (holographic is popular)
Tripod (optional)
Scissors (optional)
Tape (optional)
Clamps for hanging (optional)
SETTINGS:
Manual focus
Wider aperture (at least f/2.8 or f/4)
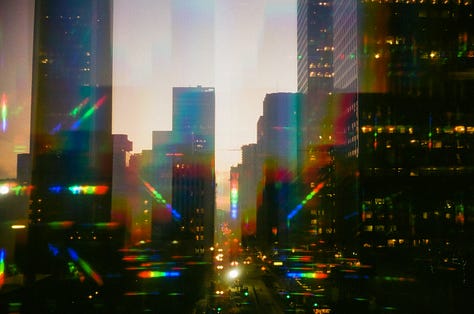
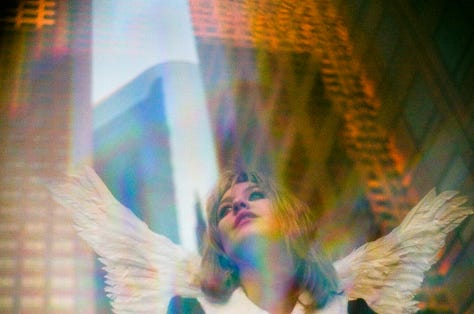
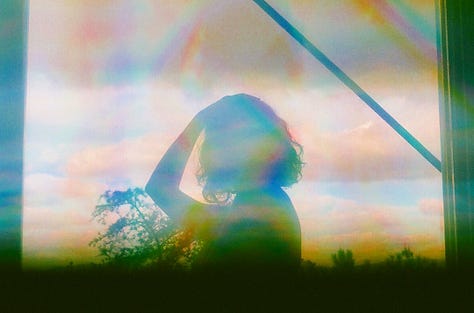
If you weren’t a fan of physics in high school, you may have forgotten the magic of diffraction. It occurs when a system of waves spreads out after passing through a narrow aperture or across an edge.
Diffraction glasses contain thousands of tiny slits. Upon contact with them, light scatters into its component colors: red, orange, yellow, green, blue, indigo, and violet. Like the human eye, a camera perceives this phenomenon as rainbow bursts.
Disposable frames are the easiest to work with. Place them before the lens, frame your subject, and shoot. Besides being light and pliant, they’re readily available!
SUPPLIES:
Camera and lens
Diffraction glasses
Strong light source (in frame)
Tripod (optional)
SETTINGS:
Manual focus
Medium-slow shutter speed (at least 1/125; slower than 1/60 requires a tripod)
Wider aperture (at least f/2.8 or f/4)
When white light passes through a prism, it’s separated and bent into a rainbow of colors. This process is known as dispersion.
Prisms aren’t just limited to triangular forms, as seen in Pink Floyd’s iconic The Dark Side of the Moon album cover. They’re three-dimensional solid objects with two identical ends and equal cross-sections (e.g., parallelograms or rectangles). Some prisms are square (4-sided), pentagonal (5-sided), or hexagonal (6-sided).
With subtle distortion and flare, you can transport audiences to surreal environments where anything seems possible.
There's no formula to follow, but you can keep some tips and tricks in mind:
Establish a shallow depth of field with a wider aperture and longer focal length.
Focus your lens manually until you see through the prism.
It’ll take some trial and error, but you have to move the prism around the lens edge until you strike visual gold.
Shooting outdoors is ideal, but you don’t want the sunlight to shine directly overhead.
Although more expensive, the handheld triangle and orb prisms from Prism Lens FX provide flexibility and deliver consistent results. Plus, they’re compatible with handles and articulating arms for added security!
SUPPLIES:
Camera and lens
Prism
Strong light source (in frame)
Handles or articulating arms (optional)
Tripod (optional)
SETTINGS:
Manual focus
Wider aperture (at least f/2.8)
Looking to create memorable in-camera special effects? FX filters can help! Dream, linear prism, kaleidoscope, split halo, radiant, flare, chromatic, and starburst are all viable options.
Similar to traditional neutral density or polarizing filters, FX filters attach to lenses, giving users more freedom to compose and shoot. In addition to shielding their expensive glass from the elements, this feature offers photographers more peace of mind.
SUPPLIES:
Camera and lens
FX filter (examples here)
Tripod (optional)
SETTINGS:
Manual focus
Wider aperture (at least f/2.0 or f/2.8)
Fairy lights go beyond decor. In the studio or field, photographers use them to cast a gentle, incandescent glow without overpowering subjects.
If you want some magic of your own, first select the best type of fairy lights. Those made with pliable copper wire are ideal for wrapping around objects or people. Others hang in large sections like curtains. In addition to being energy efficient and waterproof, strands with LED bulbs come in an assortment of colors. While on the go, you may prefer battery-operated versus plug-in lights.
Secondly, it’s important to test several placements. Most photographers prefer to arrange lights in the foreground or background to achieve a soft, dreamy effect. The wider the aperture, the more bokeh will pop. Alternatively, when you aim to capture the shapes of individual bulbs, hang them on the same plane as the subject and photograph with narrower apertures for a greater depth of field.
SUPPLIES:
Camera and lens
Fairy lights
Tripod (optional)
Clamps for hanging (optional)
SETTINGS:
Manual focus
Long exposures at a slower shutter speed (slower than 1/60 requires a tripod)
Wider aperture (at least f/2.8)
Did you know that you have the power to shape light? Aside from a camera with accessories, some craft supplies are required.
After you trace your lens cap on black paper, cut it out with scissors. Then, sketch your favorite bokeh shape at the center. The simpler, the better. Triangles, hearts, and stars are popular choices!
Use the precise blade of the craft knife to remove your design. Ideally, the width of your bokeh shape will be about 15-20mm.
When you place this makeshift filter in front of your lens, open it up to the widest aperture setting to achieve the full effect.
SUPPLIES:
Camera
Average to telephoto lens (50mm or longer)
Lens cap
Tripod
Pen
Black paper
Scissors
Craft knife
SETTINGS:
Manual focus
Slower shutter speed
Wider aperture (at least f/2.8)
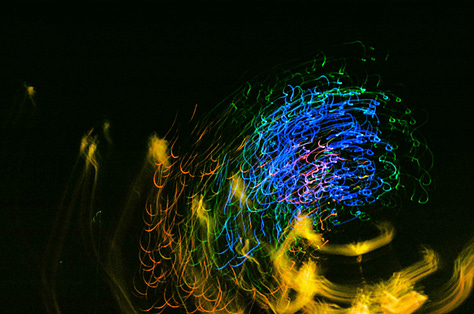
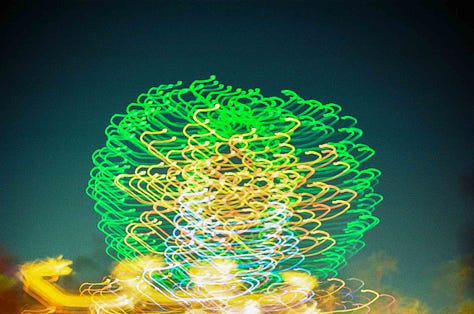
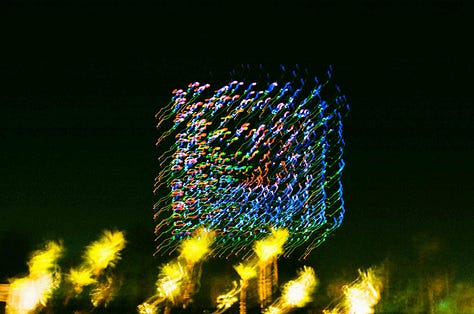
Have you ever dreamt of painting with light? You don’t need magic, just the right equipment!
To get started, find a portable light source and a camera capable of making long exposures. Since this style of photography requires slower shutter speeds to let in more light and document movement, you’ll most likely require a sturdy tripod. Along with a higher f-stop, this will ensure that your letters, lines, and shapes remain in focus.
During blue hour, about 20-30 minutes after the sun dips below the horizon, people find the most success with light painting. The less ambient light, the better.
Flashlights are not the only portable light source available. Many individuals experiment with pen lights, glow sticks, and drones! The sky is the limit.
SUPPLIES:
Camera and lens
Portable light (in frame)
Tripod
SETTINGS:
Manual focus
Long exposures at a slower shutter speed (slower than 1/60 requires a tripod)
Narrow aperture (at least f/8 or f/10)
Low ISO (between 100 to 250)
Post-processing software helps artists take their works from bland to brilliant. Sharpening, coloring, elevating contrast, and balancing lighting are crucial steps in the workflow. Some design tutorials even demonstrate how to replicate bokeh, diffraction, dispersion, or light trails across varying images.
So why put in the extra effort?
Watching special effects unfold in real time is inherently magical. Besides improving base knowledge and honing skills, the photography techniques we covered help you stay present.
Whether you’re an amateur or a professional photographer, your instincts matter. Trust them. They may be the most valuable tools in your kit.


